Fermented rhubarb & beetroot salad with broad beans

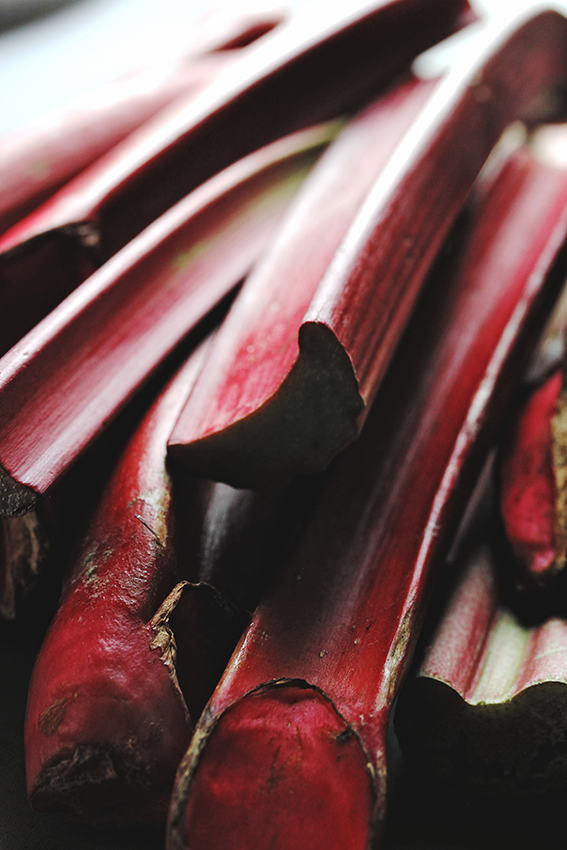
A few weeks ago I already wrote about my efforts to find a way to preserve rhubarb without pickling it with loads of sugar or making jam. Instead of using sugar as a preservative, I experimented with lacto-fermentation and let a jar of rhubarb sit for two weeks in a slightly salty brine. I guess you could also use whey to help the fermentation process along. Initially I expected it to be way too sour and thought about adding a little rice malt syrup, but let me tell you: you absolutely won’t need any sweetener! The rhubarb looses most of its sharpness without becoming bland. It turns into a delicious pickle that you can add to salads like the one below, to nourish bowls or eat straight from the jar. It’s also especially great as a sandwich topping. Give it a try on creamy goat’s cheese – so good!

In case you are new to fermentation: In a nutshell, it’s a technique that not only helps to preserve food and adds flavour, but has many, many health benefits. It is definitely worth the effort, since at least in Germany it is almost impossible to find truly lacto-fermented vegetables in stores. Even in organic grocery stores pickles, such as gherkins, or sauerkraut are being pasteurized – and therefore devoid of any beneficial bacteria – and pickled in vinegar and often sugar instead. Wild-Fermentation on the other hand means that the sugars and starches present in vegetables and fruit are converted into lactic acid by bacteria called lacto bacilli (hence ‘lacto-fermentation’). You don’t need to add any culture or starter, the bacteria and enzymes that are necessary for that transformation process are in and on the surface of fresh veggies and fruit. The main benefit of fermented food is that it enhances the nutrients present in the food and makes them more readily available. Fermented foods are packed with enzymes and probiotics, which help maintaining a healthy gut flora and ease digestion, especially of protein. Which is why many cultures eat fermented foods, such as sauerkraut, kimchi or yoghurt along rather heavy meat dishes. Fermentation turns humble and cheap veggies like cabbage almost effortlessly into real superfoods – how cool is that?

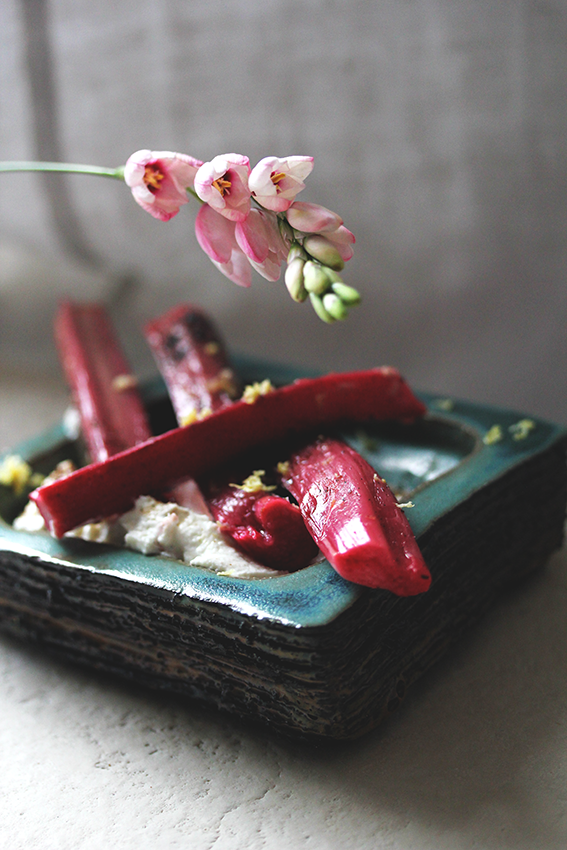
Lacto-fermented rhubarb pickles

1 liter (1 quart) jar with a fitting lid

5 rhubarb stalks

1 small or 1/2 large red onion

1 1/2 tbsp high quality salt

ca. 400-500 ml water

1 bay leaf

1 tsp mustard seeds

1 tsp fennel seeds

1 tsp allspice

To prevent spoilage, you should start by sterilizing the jar. I simply fill the jar with boiling water and let it it sit for 10 minutes but you can also place it on a tray and put in the oven for 10 minutes on 180°C.

Meanwhile wash the rhubarb and cut it into 2 cm pieces. Slice the onion horizontally. To make the brine mix 400ml water with 1 tbsp salt. Place rhubarb, onion and spices in the jar and cover with the brine. Sprinkle with the remaining 1/2 tbsp of salt and make sure everything is covered with liquid. This is very important – I used a little saucer to way down the rhubarb, but you can also buy weights that are especially designed for that purpose. If necessary add more water, but make sure to leave about 2cm space underneath the top of the jar, because the veggies and their juices will expand during fermentation. Close the jar with an airtight  lid and let it sit at room temperature. Now all you have to do is wait for approximately two weeks. After that time the pickles can be stored in the fridge.

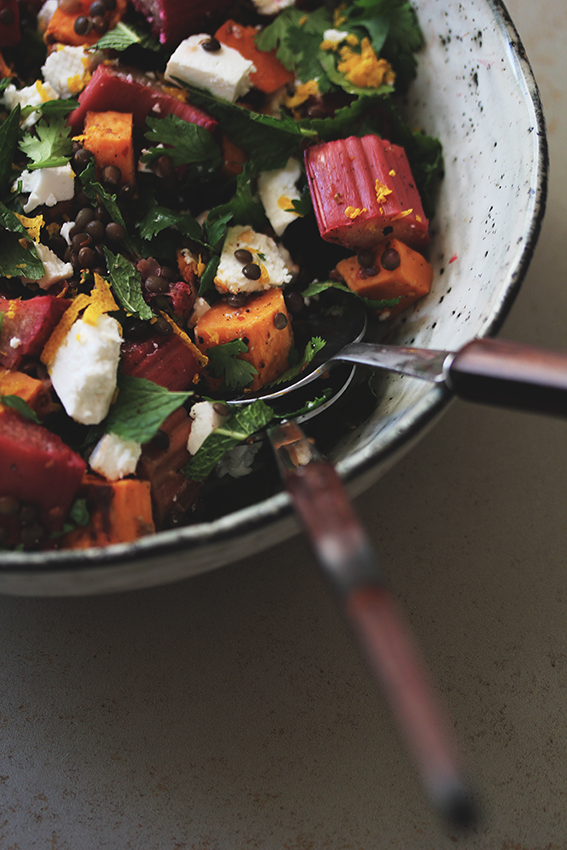
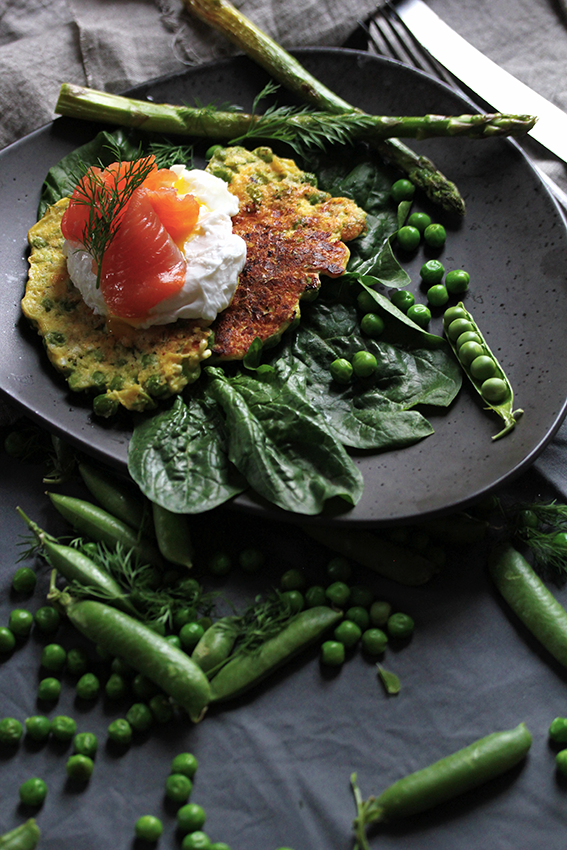
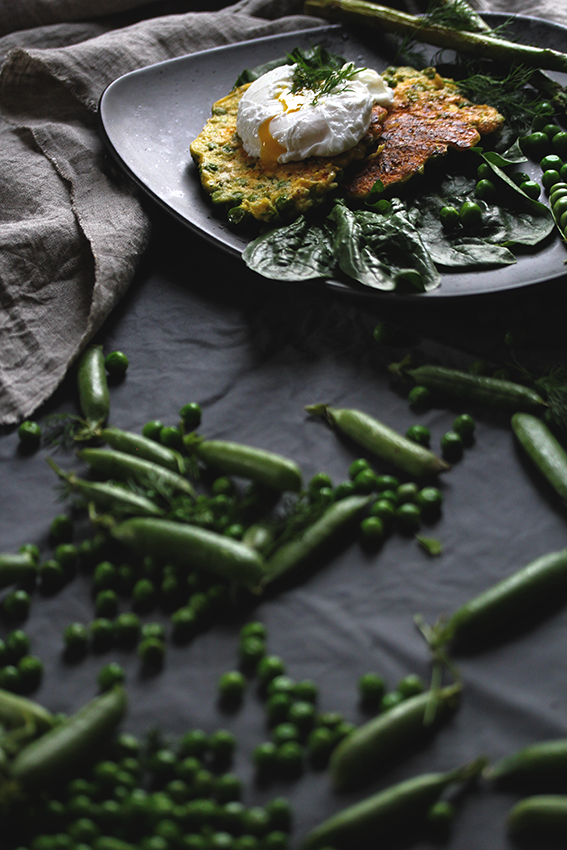
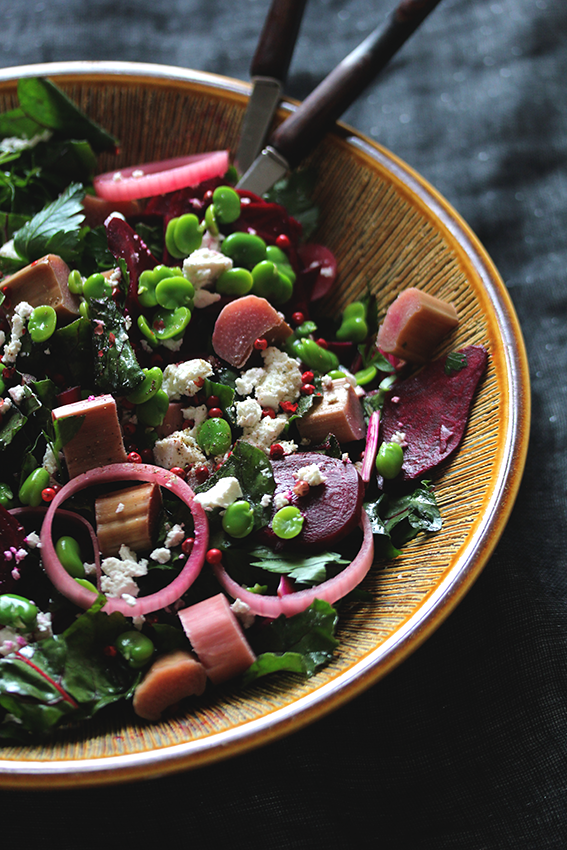
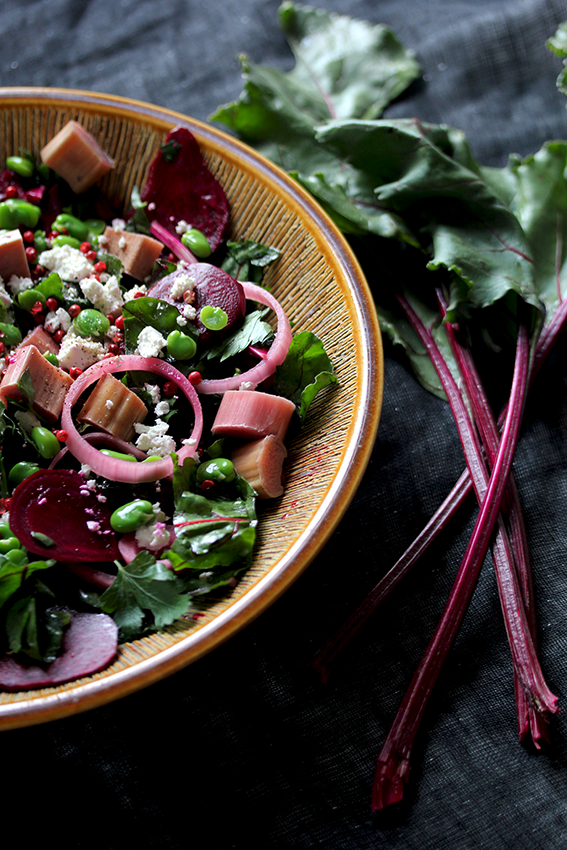
This salad celebrates the early summer season and really is the result of some kind of brainwave that hit me when I saw those beautiful beets on the market. Usually I’m not the biggest beets fan around, because I tend to find their sweetness too bland especially when they are cooked. I like them best in combination with strong flavours such as lots of apple cider vinegar and roasted walnuts. No wonder my jar with fermented rhubarb and onion sprung to my mind. Feta or soft goat’s cheese is obviously another component that rounds the tangyness of the rhubarb and adds a kick to the sweetness of the beets and the tender beans.

Fresh beets can’t be compared with their canned or vacuum packed counterparts. And yes, you can definitely eat them raw along with their greens! Like other dark leafy greens such as kale, spinach and chard they are packed with vitamin A and K (remember that those are fat soluble vitamins – so don’t use that olive oil too sparingly). When I eat them raw, I like to massage them a little with oil to help to break down their cellulose structure and aid digestion. But beet greens are also great in a quick sauté, as an addition to frittatas or quiches.

Kefir & Berry Ice Pops // From Hand To Mouth

3 beets with their greens (you can replace the beet greens with baby spinach)

ca. 350g fresh broad beans (fava beans), which should leave you with about 100g podded beans

rhubarb pickles and onion slices

100 g feta cheese

1 small bunch of flat leaf parsley

1 tbsp pink pepper berries

2 tbsp olive oil

beets-and-beans

Peel the beets and slice them as thin as possible using a mandoline or a food processor. Wash  the greens and slice the stalks into 1 cm pieces. Marinate the beetroot slices and the stalks in about 100ml of the liquid from your jar with the fermented rhubarb.

In the meantime remove the broad beans from their pod and blanch them for about 2 minutes in boiling water. Drain them, then place them in a bowl with cold water and gently squeeze the bright coloured tender beans out of their skin.

Chop the beet leaves, drizzle them with 1 tbsp of live oil and gently massage them like you would with kale. Chop the parsley. Add the beets with the stalks and about 5 tbsp of the fermented rhubarb along with a few of the onion slices. Make a dressing from the beets’ marinate, 1 tbsp olive oil, black pepper and maybe a little salt (keep in mind that the fermentation liquid, the rhubarb and the feta are salty as well). Mix everything in a large bowl an top with broad beans, crumbled feta and pink pepper berries.


Pecorino spinach balls with sage butter

This is one of those recipes, that only call for a few ingredients, are very easy to make and yet SO delicious that they will become a staple in your household. These little balls clearly fall into that category. No recipe testing was needed, they turned out perfectly in the first attempt and we couldn’t stop munching away on them – definitely a ‘keeper’. Who needs falafel anymore?

Pecorino spinach balls with sage butter

Granted, one of the reasons I will be making them again and again is the sage butter. There is nothing that doesn’t taste even better with fried sage (yes, we’re talking vanilla ice cream with fried sage leaves here) and the combination with the salty Pecorino is just divine. I think it was when I ate Saltimbocca – veal lined with prosciutto and sage – for the first time that I was hooked. In fact, the spinach balls would be a perfect accompaniment for a dish like Saltimbocca and other veal or roasted chicken dishes. They also make a great starter for a Mediterranean menu or an addition to a buffet since they are the epitome of eating ‘from hand to mouth’.

Pecorino spinach balls with sage butter (makes 15)

500g fresh or frozen spinach

120g old Pecorino + a little more as topping

70g almond meal (you can also use the pulp from making almond milk)

2 eggs

1 clove of garlic

1/2 tsp nutmeg

1/2 tsp freshly ground black pepper

For the sage butter:

70g butter

20 sage leaves (a large handful)

Preheat the oven to 160°C. Either thaw the frozen spinach on low heat or gently sauté the fresh one. Place spinach in a strainer and squeeze out as much liquid as possible using a spoon. Shave off a bit of the Pecorino and set the shaves aside. Grate the remaining 120g of it. Add all ingredients to a food processor and mix until combined (you could also use a hand held blender).

Form even sized balls with your hands, place them on baking tray lined with parchment paper and bake them for 12-15 minutes. They should slightly firm up, but make sure, you don’t bake them too long or they will dry out.

In the meantime, melt the butter in a pan on medium heat and add the sage leaves. Take out the spinach balls, drizzle with sage butter and top with pecorino shaves. They are delicious when served straight from the oven, but are also great served at room temperature.

Pecorino spinach balls with sage butter

Rhubarb & lentil salad

This salad is the perfect solution for the very short time of the year when the ‘seasons’ of rhubarb and picnics and barbecues overlap. Since I’m slightly obsessed with rhubarb this time frame must not be allowed to pass unused!

As we all know, the ‘problem’ with rhubarb is that is sour – very sour. The most common solution is therefore to add lots of sugar and turn it into a compote or jam and to use it in baking (ok, granted: the sour-sweet combination is a nice one). Since I don’t eat sugar, I recommend using a good quality stevia product or rice malt syrup. You can still enjoy your rhubarb, but without the side effects. On the contrary rhubarb itself is very rich in fiber, which is great for your digestion and is also a good source of vitamin C. To prolong the rhubarb season, I’m currently ‘working’ – or rather the bacteria are – on a little rhubarb fermentation project with no sweetener at all. I’ll keep you posted.

Rhubarb

Although rhubarb is actually a vegetable, at least in Germany it is not very common to use it in savoury dishes. Which is a shame since it is so incredible versatile. So if you are bored of rhubarb compote over and over again and want to cut down the sugar, start to think about using it in chutneys and salsas or as an addition to salads. It makes an especially great accompaniment to hearty dishes like grilled meat or to substantial salads like this lentil and sweet potato combination. Which is why this salad is perfect for your next barbecue! It is a crowd pleaser, filling enough for any vegetarian friends, it can sustain some time in the sun and makes a great leftover (although I doubt, that there will be anything left).

The recipe makes a really BIG bowl of salad. If you plan to make it for a normal dinner, you might want to half the measurements. It also keeps well in the fridge and can feed you the next days.

Rhubarb & lentil salad (serves 6-8)

300g Beluga lentils (can be substituted with brown lentils)

750g rhubarb (ca. 5-7 stalks)

1 medium sweet potato

200g feta cheese

1 organic orange

1 bunch of mint

3 tbsp granulated stevia or rice malt syrup (can be replaced by other natural sweeteners)

1 bunch of coriander

1 tsp ground vanilla or 1 scraped out vanilla pod

7 cardamom pods

1 tsp coriander seeds

1/2 tsp chilli flakes

2-3 tsp high quality salt

1 tbsp coconut oil

1 tbsp olive oil

1 tbsp apple cider vinegar

If possible, start by soaking your lentils, preferably overnight, in an acidic medium (water with apple cider vinegar, kefir or yoghurt – read more about it here).

On the next day, preheat the oven to 200°C. Wash the lentils and then cook them for about 20 minutes. They should be cooked through but still have some crunch and shouldn’t start losing their shape. Drain them and place them in a large bowl. Immediately drizzle them with olive oil and apple cider vinegar, add 1 tsp of salt (or more to taste, but remember that the feta is salty) and the chill flakes.

While you cook the lentils, peel and dice the sweet potato. Roast the coriander seeds in a skillet without oil and then ground them together with the cardamom seeds with a mortar and pestle. Melt 1 tbsp of coconut oil. Place sweet potato on a baking tray and mix with spices, 1 tsp of salt and oil until the are covered with the mixture. Place in the oven and roast for about 20 minutes or until soft.

Meanwhile, wash the rhubarb and slice it (2x3cm should be fine, if the pieces are too small, the rhubarb might disintegrate while it’s in the oven). Wash the orange and carefully zest it. Add the zest to the cooked and drained lentils, but set a little aside for decoration. Place the rhubarb in an ovenproof dish. Juice one half of the orange and drizzle the rhubarb with it. Add granulated stevia (or other sweetener) and vanilla. Make sure the rhubarb is covered with the mixture. Take out the sweet potato, lower the heat to 160°C and place the rhubarb in the oven for 15-20 minutes, until it’s become slightly soft, but hasn’t started to disintegrate.

Dice the feta and chop the herbs. Add everything to the lentils and mix carefully. Season to taste with salt, chili flakes, a little more orange juice and olive oil. Sprinkle with orange zest and serve.

Note: The salad keeps well in the fridge especially if you add the feta and the herbs just before serving.


Pea fritters

I already wrote about my love of fritters. One of the great things about them is their versatility. You can use a basic recipe and adapt it to the season. I like to play around with the said basic recipe, which sometimes leads to – ahem – failures. But this is what recipe testing is for, isn’t it? Despite some disappointments on my side (yes, I’m thinking of you, broccoli-parmesan-coconut flour MESS), fritters are the perfect – fast, cheap, versatile – way to use up leftover veggies in the back of your fridge, create something even picky eaters might like and that will make a great breakfast or lunch the next day – WIN WIN.

This time I wanted to use an ingredient that is so commonly available as a frozen product, that – at least in Germany – it’s hard to find fresh, despite being an iconic spring produce: the humble pea. Podding peas isn’t a widespread activity. Well, it IS time consuming. But instead of joining an expensive Slow Movement seminar, I’m suggesting to get your friends or kids around the table and take some time to pod your peas. I was quite excited when I finally found some on the market and had a chat with the marketer: He called them healthy chips, because he uses to sit in front of the TV and is enjoying them straight from the pod – a crunchy and sweet snack. I thought this to be a great idea! Just make sure, the peas are young and fresh – only then you should enjoy them raw.

Peas

You could easily call these protein fritters. Peas are an excellent source of protein, they provide a wide range of essential and non-essential amino acids, which is why they are popular as a vegan protein powder. The fresh peas also contain quite a lot of iron and B vitamins. Cottage cheese has quite a reputation as a ‘diet food’, due to its low-fat and high-protein content. Traditionally it was made from the skim milk that was left over from butter making. In the fermentation process the casein-containing portion of the milk separates from the whey and the curds that are typical for cottage cheese form. I actually tried to drain the cottage cheese even further (I was afraid the fritter mixture would be too liquid) by placing it in a cheese cloth overnight and then wringing it out, but this proofed to be quite unnecessary, because the cheese already is almost completely devoid of the whey.

The fritters are really filling – especially if you serve them with a poached egg and the (wild-caught! Please never buy any farmed salmon, even if it’s organic!) salmon. No one was able to eat more than three. The good thing is, any leftover really will make a satisfying and long lasting breakfast or lunch box addition.

Pea fritters (makes 12)

400g cottage cheese

250g fresh or frozen peas

3 eggs

1 shallot

2 tbsp arrowroot powder (can be substituted with corn starch)

1 tbsp high quality protein powder (optional, if you don’t use it, add another tbsp arrowroot powder)

1 small bunch dill

3 tbsp freshly grated horseradish

1 tbsp lemon zest

a pinch of freshly grated nutmeg

high quality salt, pepper

ghee or coconut oil for frying

To serve:

fresh spinach or other greens

green asparagus

1 poached egg per person

wild-caught smoked salmon

more dill, lemon zest and grated horseradish

If you’re using frozen peas, thaw them. If you’re using fresh ones, blanch or steam them for 1-2 minutes. You can either use a food processor or a hand held mixer for this recipe. If your using the latter, start by mashing 150g of the peas with a fork. Chop the dill and grate the horseradish and lemon zest. Place all ingredients, except for the whole peas, in a bowl (or the bowl of your food processor) and whisk together. Than incorporate the whole peas.

Melt ghee or coconut oil in a pan on medium to high heat, place one tablespoon of the mixture in the pan and form a fritter. I could fit three fritters at a time into my pan. Wait until bubbles show on the upside, for about 3-5 minutes, than flip the fritters and give them an additional 2-3 minutes in the pan. Lower the heat after the first batch and add fat for the next one if needed.

If you like, serve with a poached egg, greens, quickly sautéed green asparagus and some more peas.

Pea-Fritter

Raw Matcha Cake

Ah, there is nothing quite like a birthday cake! Although I’m not baking often, I love these special occasions to try out recipes, I have been holding on to for such moments. Maybe to fight off the signs of ageing, I got a powerful and exclusive dose of antioxidants: Japanese matcha powder. And what could be a better idea to start my rejuvenation by incorporating it into my birthday cake? Special guests deserve a special cake. Oh, and in case you wondered: it was unbelievably delicious. Creamy, super light and yet with a wonderful crunch. The perfect cake for birthday party in the spring.

So what makes matcha such a ‘thing’ – besides its colour, which obviously inspires people to create all sorts of recipes with it? Before telling you about its true superfood qualities: matcha has a unique taste, that I’m absolutely in love with, but find it hard to describe. It’s light, delicate, citrusy without acidity, some call it grassy. Matcha powder are carefully stone-grounded Japanese green tea leaves. So when drinking matcha you don’t just steep the tea leaves, but consume the whole leaves, which gives you a much more powerful dose of the green tea’s nutrients. What makes matcha so exclusive and gives it its vibrant green colour is the fact that the plants become shaded prior to being hand-picked. This enhances their chlorophyll and amino acid content. It is the amino acid L-theanin, which lends matcha its special qualities. Matcha does contain caffein, but thanks to the L-theanin it promotes sustained concentration without leaving you with the jittery feeling that often comes with coffee. A powder that thanks to its high antioxidant content helps to protect you from free radicals, increases the metabolism, gives you energy and calmness at the same time – this sounds like true magic to me! Whisking up a cup of matcha is a ritual I enjoy, but when your new to it, don’t let yourself be intimidated by the equipment. The froth might not be as perfect, but any whisk and wide cup or little bowl will do. Just remember – like with normal green tea – to never use boiling water. 80°C is perfect. And I definitely recommend to experiment with a almond or coconut milk matcha lattes – so good!

There is a wide range of different qualities of matcha powder to be found. For this recipe a ‘cooking grade’ matcha will possibly be fine. However, I recommend to go for a mid-range quality, because you surely want to drink your matcha with all its superfood properties and don’t just want it to use in baking.

How to make whipped coconut cream:

Whipping up some delicious coconut cream isn’t just an ‘alternative’ for the dairy-intolerant and vegans among us – it is a super simple instant dessert. A little warning: it actually is so easy to make that it is dangerously addictive, just saying…

All you have to do is to buy a regular can of coconut milk (just make sure, it does not contain any additives that stop the coconut cream and water from separating or other nasty stuff like preservatives). I usually buy one with 65% coconut cream (don’t use ‘light’ coconut cream – in fact, never use any ‘light’ products). Place the can in the fridge overnight to make sure the cream separates from the water (this won’t be necessary in the European winter months). Open the can and pour out the water (or scoop out the cream, whichever happens to be at the top). Don’t discard the water, use it in smoothies or soups. You can whip up the cream with a hand mixer just like cow’s milk cream. It’s mildly sweet and delicious with a sprinkle of cinnamon or some berries.

A note on consuming nuts: I wrote about the importance of soaking grains and legumes before – the same applies to nuts and seeds. They should be soaked, sprouted or roasted, because they contain enzyme inhibitors, which make them though to digest (read more about this here). Therefore I recommend to ‘activate’ all your nuts. ‘Activating’ them means to overcome these inhibitors, preferably by soaking them overnight in lightly salted water and then slowly ‘drying’ them in the oven at a very low temperature (or with a dehydrated, if you happen to own one). While I avoid to consume raw nuts, I have to admit, that I am often using a shortcut, which is not as effective, but still a good choice and also makes the nuts so much tastier. I simply roast the nuts in a pan, which brings out their ‘nutty’ flavour even more. Just make sure, you don’t burn them – this would ruin all your effort to make them even healthier.  If you want all ingredients to be absolutely raw, you can skip this step – the cake recipe will still work out fine.

Raw Matcha Cake

Raw Matcha Cake

For the crust:

200g (1 1/2 cups) almonds

40g (1/2 cup) shredded coconut

2 tbsp coconut oil

1 tbsp rice malt syrup

a good pinch of sea salt

For the filling:

270g (2 cups) cashews

1 can coconut milk

35g granulated stevia

small bunch of mint (about 10 springs)

juice of 2 limes

11/2 tbsp matcha powder + a little more for dusting the cake

a tiny pinch of sea salt

Raw Matcha Cake

Start the night before, or at least two hours prior to making the cake, by soaking the cashews in water. You also might want to place the can of coconut milk in the fridge for making the whipped coconut cream (see note above).

On the next day, line the bottom of a 20cm springform tin with baking paper. Place the almonds (either raw or activated) in a food processor and process them until you’re left with small chunky crumbs. Melt the coconut oil and lightly roast the shredded coconut in a pan (be careful, it burns easily! Again, you can skip that step for a completely raw cake). Combine almond crumbs with the rest of the ingredients. The mixture will not completely stick together, but don’t worry: Press it with your hands very firmly into the base of the tin and then place it for at least half an hour in the freezer to set.

To make the filling, whip up the coconut cream and place it in the fridge. Drain and rinse the cashews and place them together with all the other ingredients, except the coconut cream, in a high-speed blender or food processor. I had to use my food processor, but if your blender is powerful enough, I think this is the better option. It may take some time, but in the end you will be left with a delicious cream. Fold in the whipped coconut cream with a spatula or wooden spoon. Pour the mixture evenly over the base in the tin and place it in the freezer until solid (for about one hour). Take it out 30 minutes prior to serving – it will become super creamy without losing its shape. Right before you serve it, sift a little matcha powder on top.


Green asparagus with lemon curd & dill gremolata

It’s asparagus time again! I already wrote about my love of it – especially the green kind – last year, so naturally I was looking forward to its reappearance. We had a spring dinner on sunday with this lemony light asparagus dish and creamy labneh with roasted rhubarb as dessert. I tell you there is no better combination than asparagus and rhubarb!

Asparagus with lemon curd // From Hand To Mouth

In case you’re no so familiar with asparagus yet (you should do something about that now!) or only have the odd white asparagus lunch once a year (Germans will know, you are obliged to, and common: it is worth it), know this: it’s easy to cook with and absolutely no fuss! Unlike white asparagus, the green one does not have to be peeled. In fact, it does not even need to be cooked, but is quite delicious raw. Use a potato peeler and shave the asparagus so that you get ribbons. They are delicious in any salad! Of course you can steam or blanch the asparagus, but my favourite way is to quickly sauté it in butter. It takes less than 5 minutes, adds a delicious nutty flavour and the asparagus remains a slight crunch – so good!

Asparagus with lemon curd // From Hand To Mouth

The asparagus issue was settled. Maybe because it seemed all too easy, I got a little innovative with the sauce (I’m still not absolutely sure, whether this is a good thing). One thing was clear, I wanted it as lemony as possible. You can imagine what came to my mind next: a savory lemon curd! This might be nothing for the purists, but I reassure you, it really turned out  nicely and rather sharp, which was what I was after.

You can serve the asparagus with the lemon curd, the roasted lemon and the gremolata (that gremolata was possibly my favourite part of the dish!) all by it self as a light meal or a starter. We had sea trout with it and I imagine that salmon would be a great addition as well. Even something like roasted chicken thighs might work well.


Green asparagus with lemon curd, roasted lemons & dill gremolata (serves 4)

1 kg green asparagus

800g sea trout filet (optional)

1 tbsp butter or ghee

1-2 tbsp olive oil

1 large or 2 small organic lemons + some more to drizzle lemon juice to drizzle the fish

sea salt and black pepper to taste

For the lemon curd:

zest and juice of 4 organic lemons

100g butter

3 eggs and 1 egg yolk

2 tbsp of granulated stevia (or other natural sweetener of choice)

a pinch of sea salt

For the lemony dill gremolata:

1 small bunch dill

1 small bunch flat leafed parsley

1 clove of garlic

2 tbsp olive oil

1 tbsp lemon zest

sea salt to taste

Green asparagus with lemon curd & dill gremolata

Start with the lemon curd. Zest and juice the lemons. Put the juice and zest in a heatproof bowl or small saucepan, add the butter, stevia (you don’t want the curd to become sweet, but you’ll need a bit of sweetness to balance out the sharpness of the lemons. You may want to start with just 1 tbsp and add more later, if you find it to be too sharp) and a pinch of salt. Place the bowl over a pot of simmering water, but make sure that the bottom isn’t touching the water. Stir lightly until the butter has melted. Turn down the heat, if the mixture is to hot the eggs will curdle. Mix the eggs lightly and stir them into the butter mixture. Stir continuously for about 15 minutes. Don’t worry, this step takes its time. At some point the mixture should become thick and custard like. Remove it from the heat and stir occasionally as it cools. Taste and add some stevia or salt as needed.

Preheat the oven to 160 °C. To make the roasted lemons, slice a lemon horizontally and remove the pips. Blanch the lemon in boiling water for 2 minutes, then drain and pat dry. Mix them with 1 tbsp olive oil and some salt and place them on a parchment-lined baking tray. Roast in the oven until they have dried for about 15 minutes, but be careful not to burn them too much.

To make the gremolata, chop the herbs. Crush the garlic with the salt, mix with herbs, lemon zest and olive oil.

If you make the fish, wash and dry the filet and cut it into four even sized pieces. Line on a baking tray, drizzle with olive oil and lemon juice and rub in some salt and black pepper. Turn the heat of the oven down to ca. 120 °C and roast the trout until it is just cooked trough, ca. 15 minutes. The flesh should have turned slightly opaque, but should not start to start to dry out.

Chop of the though ends of the asparagus. Melt butter or ghee in a large pan and sauté the asparagus on medium heat for about 5 minutes. Assemble everything on a plate and enjoy!

vk8uhttjyf9

Homemade labneh with rhubarb & liquorice

This little dessert is inspired by Yotam Ottolenghi, who has been writing about his love of labneh – strained yoghurt – for years. And yet somehow I always thought, well, why not simply buy quark or cream cheese? Oh, how wrong I was.

Draining yoghurt is obviously very easy, but as with all new ‘techniques’ such as sprouting, fermentation, making almond milk or the first real bone broth it still feels like some alchemic experiment. Once successfully mastered (oh, how I hate it when something fails to work – my more sophisticated self would of course tell you, that failures are part of the process) it becomes more of a routine and loses the ‘excitement’ and that feeling of anxious curiosity. Therefore I am grateful that there are always new things to be discovered, that don’t cost a fortune, are super simple and yet SO tasty. I ventured out to get myself a linen cloth, because I had already made the experience that a fine strainer is too permeable. I simply lined a strainer with the cloth and placed it over a bowl, but it’s also possible to wrap up a sack-like bundle, hang it on a wooden spoon that you place across a bowl.

Labneh with rhubarb and liquorice

The licorice root powder was another flavour experiment. I found it two years ago in Copenhagen (where else if not in Denmark or Sweden would you find such a thing?). A friend of mine who lived in Stockholm told me about vanilla ice cream served with licorice sauce and when I finally came across that sauce as well as the powder, I simply had to have it. I mean – liquorice! Ahem, maybe I should explain, that I’m deeply in love with the combination of sweet and salty: dark chocolate with sea salt, roasted almonds with coconut chips, cinnamon and a little salt and of course very, very salty liquorice… However, I found the powder to be very sweet, almost a little too much for me (so if you use it: a little goes a long way, just saying). Since I’ve quit sugar I find even liquorice root tea almost unpleasantly sweet – everyone else who has tried the dessert seemed to like it and the combination of the creamy labneh, the tart rhubarb and the sweet and yet unexpected liquorice is indeed truly divine. Of course not everyone likes liquorice or it might be hard to get hold of the powder – in this case, simply replace it with roasted pistachios or almonds.

peony

Homemade labneh with rhubarb & liquorice (serves 4)

700 g Greek style yoghurt (I used sheep’s milk yoghurt which has ca. 6% fat)

100 g feta

1/2 tsp unsweetened grounded vanilla (or vanilla powder)

1 tbs organic lemon zest + a drizzle of lemon juice

2 tbs granulated stevia (or other natural sweetener of choice)

For the rhubarb topping:

500g rhubarb

5 cardamom pods

1/2 tsp unsweetened grounded vanilla

2 tbs rice malt syrup

1 tsp organic lemon zest

1/2 tsp liquorice powder

Place the yoghurt in a cheese cloth (or linen cloth, or muslin), hang it over a bowl either using a stainer or a wooden spoon to hold it and let drain over night. I let it drain for about 20 hours, but if you are short of time 8 hours will do. Also give the bundle a little squeeze in the end to help the draining. You can let it sit at room temperature (as long as it is not really hot outside), the yoghurt will continue to ferment, which is a good thing (make sure, you use a high quality yoghurt). I was surprised with how much whey I ended up, almost half of the yoghurt seemed to have drained away. Don’t throw that whey out! It is rich in minerals and you can use it to help ferment vegetables, to soak grains and legumes or to add it to condiments like mayonnaise to enhance the shelf life.

Labneh with rhubarb and liquorice

On the next day, crumble the feta into a bowl and mash it with a fork. Add all the other ingredients and stir with a spoon until the mixture is creamy. Place in the fridge until you’re ready to serve.

Preheat the oven to 180°C. Cut the rhubarb into ca. 7 cm batons. Ground the cardamom with a mortar and pestle. Mix the cardamom, vanilla, 1 tbs of the rice malt syrup and 1 tbs of hot water. Mix the rhubarb with that mixture until it is coated and place it in an ovenproof dish. Drizzle with another tbs of rice malt syrup. Place the dish in the oven and roast the rhubarb for about 15 minutes until it has become tender, but not mushy. Remove it from the oven and leave it to cool.

Scoop out the labneh, assemble the cooled rhubarb on top and sprinkle with liquorice and lemon zest.

Spring ravioli with Gorgonzola & wild garlic pesto

Happy Easter everyone! I can’t tell you how happy I am that the spring has finally arrived. Every year I am eagerly anticipating some of the season’s products and when they finally arrive I am rushing to the kitchen to use them as much as possible (expect to see A LOT of rhubarb!). So this week it had to be wild garlic (asparagus, you will have to wait a little longer). I also made a wild garlic and walnut quiche, but then decided to make some fresh pasta for Easter. Since I discovered zucchini noodles a couple of years ago I hardly ever eat pasta, so I thought this would be something special for the holiday and it turned out beautifully. Light as the first green leaves…

Spring ravioli with Gorgonzola

This song by Melody’s Eco Chamber was my soundtrack when I was in the kitchen – perfect spring feelings!


Spring ravioli with Gorgonzola (makes about 18-20 ravioli, serves 2 as a light meal or 4 as a starter)

For the pasta dough:

200g buckwheat flour

1 egg + 2 egg yolkes

1 tbsp olive oil

1/4 tsp sea salt

2-3 tbsp water

2-3 tbsp of arrowroot starch to dust the surface (can be substituted by another starch)

For the filling:

200g Gorgonzola (or other blue cheese such as Roquefort or Stilton)

100g soft goat’s cheese

zest of 1 organic lemon

a few leaves of basil

pinch of black pepper

Spring Ravioli with Gorgonzola filling

Ideally, start one day ahead with the pasta dough. Since there is no gluten present in buckwheat to make the dough elastic, the overnight rest helps with the consistency. But if you don’t have the time, let the dough sit for at least 30 minutes in the fridge before you start working with it. Simply place all ingredients in a bowl. Don’t throw out the egg white – you’ll need it later to seal the ravioli (add the rest to scrambled eggs or whip up a face mask). Add one tablespoon of water at a time – you can always add more if you feel that’s necessary. Knead with your hands until a smooth, yet firm ball forms. Place in the fridge (especially if you made it the night before).

To make the filling, combine the cheeses and crush together with a fork. Be generous with the lemon zest! You might even want to use a second lemon. Add pepper and torn basil leaves.

Take the dough out of the fridge and separate into two parts. Lightly dust your work surface and a rolling pin with arrowroot starch (you could use flour, but trust me: starch works sooo much better here!). I don’t own a pasta machine (which – in case you do – you should obviously use now), but I had great success with rolling the dough out very thinly. Try to get it as thin as possible. Use a cutter or the rim of glass to stamp out 6-8cm discs. To shape the ravioli, place one teaspoon of filling in the centre, brush the edges with a little egg white. Place another disc on top and press the edges together using either your fingers or a fork. Leave the ravioli on a lightly dusted tray until you are ready to proceed.

Bring salted water to the boil. Cook the pasta for about 5-7 minutes (I found that although they rise to the top rather quickly they need a little more time than other ravioli or will otherwise remain a little too al dente). Serve with the wild garlic pesto (recipe below), a drizzle of olive oil and sprinkle with some more lemon zest.

Spring Ravioli with Gorgonzola filling

Wild garlic – pumpkin seed pesto

1 bunch (ca. 50g) wild garlic/ramson

1 bunch of basil

1 bunch of parsley

50g pumpkin seeds

juice of 1 lemon

2 tbsp olive oil

1 tbsp of pumpkin seed oil (optional)

sea salt to taste

Roast pumpkin seeds in a pan without oil. Place all ingredients in a food processor (or use an immersion blender) until a paste forms. I’ ve made the experience that it is quite easy to overdo the wild garlic and that it can become very dominant – so start slow and add more leaves according to taste (if you find it too strong, add more of the other herbs, or even some spinach or peas). Add a little water to thin the mixture if necessary, season to taste.  To keep the pesto in the fridge, put it in a tightly sealed glass container an top with olive oil, which helps to prevent spoilage.

PS: I’ ve also shared this recipe over at food52

Celeriac & Fennel Fritters with Apple-Dill Raita

I have a special relationship to fritters. There was a time, when my family would do the grocery shopping on saturdays at the Winterfeldt Markt in Berlin Schöneberg. We didn’t just go there for veggies. No. Having lunch there was the most important part. A special lunch it was, only to be found there. At least this was what I believed when I came there as a child. It used be broiled chicken, that I was looking forward to and of course the crêpes of the locally famous French crêpe-man, who seemed to be coalesced with his little stall. Those were the nineties in Berlin – there was nothing like a food scene – so this market was really something special. And then, one day, a new stall run by a Turkish family appeared. There was already plenty of great Middle Eastern food around, but they served something, I fell deeply in love with: zucchini fritters. They were fried in large pans full of bubbling oil and simply served with some flat bread and tzatziki. I really don’t know what made them so special, but I’d always come back for them even years and years later.

In any case they introduced me into the world of endless fritter-possibilities. In Germany, there really used to be just one kind of fritter: the good old potato fritter with apple puree, which never managed to allure me quite as much. When I lately thought about things, I’d like to do on my next stay at home, my good old friend the zucchini fritter came to my mind. And so I have been experimenting over the last couple of weeks with different fritter recipes to shorten the time of waiting (there will be another lovely fritter recipe up soon). When I tested the recipe, I tried to bake these in the oven. It worked out, although I found them to be lacking the golden, crispy crust. If you rather want to bake them, brush your parchment paper with a little coconut oil, or the fritters will stick and tear apart when you try to turn them. (I baked them at 160 °C for 15 min, turned them and baked them for another 15 min). Also I actually used almonds instead of hazelnuts, because I had them at hand (but I think it would be even greater with hazelnuts). Feel free to swap the celeriac for other white root veggies, such as parsnip or parsley root. These fritters are a great way to make use of those last stored roots that you might have lying around at the bottom of your vegetable box. I found myself buying really quite a lot veggies on the market, when I came home I realized, how beautiful their shades of green looked together. Nature – you’re just the best.

Celeriac & fennel fritters with apple-dill raita (makes 10-12 fritters)

300g grated celeriac

1/2 fennel bulb (ca. 150g net) with greens

1 tbsp physillum husk

2 large eggs

3 tbsp haznut meal or leftover pulp form making nut milk 

1 bunch of dill

1 clove of garlic

1 tbsp fennel seeds

1 tsp nutmeg

black pepper, salt

a handful of hazelnuts (ca. 30-40g)

coconut oil for frying

Apple-dill raita

125g goat’s curd

125g goat’s yoghurt

1 tbsp lemon juice

½ tart apple (I like Boskoop)

small bunch  of dill

salt, pepper

Start with soaking the physillum husk. Place in a cup and cover with water (about 5 tbsp), let sit for at least 15 minutes until it has a gel like texture. Grate the celeriac. Trimm the fennel and set aside the fennel greens for decoration. Shave the fennel as thin as possible. You might want to half it crosswise – too large pieces will make it more difficult to form a homogenous batter. Chop garlic and dill. Roughly shop half of the nuts and roast in a pan without oil, add the fennel seeds a little later to the pan and roast as well. Place everything in a bowl and season generously with nutmeg, salt and pepper (I found that the batter is really ‘soaking up’ the spices, so be really rather generous). Stir in the physillum husk gel and the nut meal/pulp (3 tbsp should be fine, but you may add a little more latter, should you find the batter to be too runny). Separate the eggs. Add the yolks to your batter and whisk through. In another clean bowl whisk the egg whites with a pinch of salt until stiff peaks form. Stir the beaten egg whites carefully in the batter using a wooden spoon or a spatula. Place a pan on medium-low heat and melt 1-2 tbsp coconut oil. Using a tablespoon, place a dollop of the batter in the pan and form a flat round shape. Make sure the heat is not too high and fry on each side for 4-5 minutes. Place them on some kitchen paper to drain off excess oil and keep warm until you’re done with the rest of the batter.

Meanwhile prepare the raita. Grate the apple, chop the dill and whisk together with the rest of the ingredients. Top the fritters with roasted whole leftover nuts and fennel greens and serve along with the raita.

I served the fritters with a side salad to add a little more greens, but that’s just a suggestion.

Side salad

100g lamb’s lettuce

1-2 sticks celery

drizzle of olive oil and lemon juice

1 tbsp crushed pink pepper berries, salt

Roasted chickpea & herb salad

When I’m having stressful days the thing that grounds me most is the cooking when I come home. In fact, this is what I’m looking forward to. The time I spent in the kitchen – and funnily enough especially the ‘annoying’ chopping-up bit – is not wasted time to me, but relaxing in itself. For others it might be hitting a punchbag in the gym or the evening yoga class (I do like that too), for me it’s the process of the cooking more than enjoying dinner that does the trick. So while I really love the idea of leftovers waiting in the fridge (the absolute best thing to avoid unhealthy ‘quick-fixes’ on your way home!), I’m sometimes a little sad, I’m not getting to spent some more time in kitchen. However, facing a deadline and living with a constant guilty conscience, because one should devote ALL the time there is to this one damn thing (but never does), even I had to give in and embrace cooking in batches. And since I love making pestos, hummus and other condiments I’ve got lots of different flavour options for easy things such as roasted veggies, eggs in various ways or one-skillet meals that I make during the week.

One of my favourite ‘snacks’ (I often have it instead of a ‘proper’ meal) are VERY spicy roasted chickpeas. And this is where another batch cooking comes in handy: I soak huge amounts of pulses ( in this case chickpeas) over night in water with some kefir added (or apple cider vinegar for a vegan option), cook them, freeze most of them and use the rest straight away for hummus, in stews, curries or salads. While these roasted chickpeas are delicious on their own (actually they’re dangerously addictive) making a salad out of them turns them into a real meal that is a satisfying, super quick lunch or dinner option that also keeps well in the fridge, is a crowd pleaser and great for picnics and potlucks (well, in summer at least…) since the herbs don’t wilt as quickly as salad leaves. This is just a basic recipe. The great thing is, that it is incredibly versatile and you can  add on whatever you’ve got at hand. Too good to be true? Well, you tell me.

Basic recipe (serves 2 very hungry persons or will make a great leftover)

250g cooked chickpeas

1 tbsp melted coconut oil

1 tbsp smoked paprika powder

1 tbsp ground turmeric

1 tbsp cumin

1 tsp coriander seeds

1 tsp sweet paprika powder

1 tsp sumac

1 tsp sea salt

1 bunch of dill

1 bunch of flat leaf parsley

10 springs of mint

20 black olives

½ cucumber

½ preserved lemon (see here how to make preserved lemons)

juice of 1/2 a lemon

1-2 tbsp olive oil

possible add-ons:

avocado

feta

tomatoes

fried or poached egg

dollop of Greek yoghurt

Preheat the oven to 200°C. In a pan without oil roast the whole cumin and coriander seeds. Grind with a mortar and pestle. Melt the coconut oil in the same pan. Place chickpeas in a bowl, add all spices and the oil. Mix well, so that all the chickpeas are coated with the spice mixture. Place chickpeas on a baking tray and roast in the oven for about 20-25 minutes. They should become slightly crunchy, but be careful not to burn them.

Meanwhile chop up all the herbs, the cucumber, preserved lemon, olives an whatever add ons you might be using. Mix the roasted chickpeas in a large salad bowl with all the other ingredients, drizzle with lemon juice, olive oil (be generous) and salt to taste. Serve with egg or yoghurt if you feel like it. Voilà!