Apricot Summer Cake with Pistachios

It’s been ages since I posted something – it literally has been a year since my last post – meanwhile I’ve been very busy taking many, many other photos…but that’s a long story. And for now I wanted to keep it quick and simple. Hence this summery cake (the decoration turned out quite romantic – maybe I should start a second career as a wedding photographer?) that looks and tastes stunning, but can actually be whipped up quite quickly, doesn’t go into the oven – because who wants that in summer anyway? – and can be made in advance and stored in the freezer – in case you’re busy outside doing other things.

For me apricots mark the peak of summer! I’ve always loved them, especially when they’re still a little underripe and sour. Which of course goes beautifully with the rich, creamy flavour of white chocolate that I ‘recreated’ for this recipe using cacao butter, vanilla and rice malt syrup. And there’s another ‘secret’ to this cake. Though it doesn’t look and really doesn’t taste like it, it is not the usual cashew no bake cake. Instead we’re using beans here. Yep, you heard right. It’s as indulgent as your old hummus and might as well be considered my contribution to the international year of pulses…(pulses ARE great, though folks!).

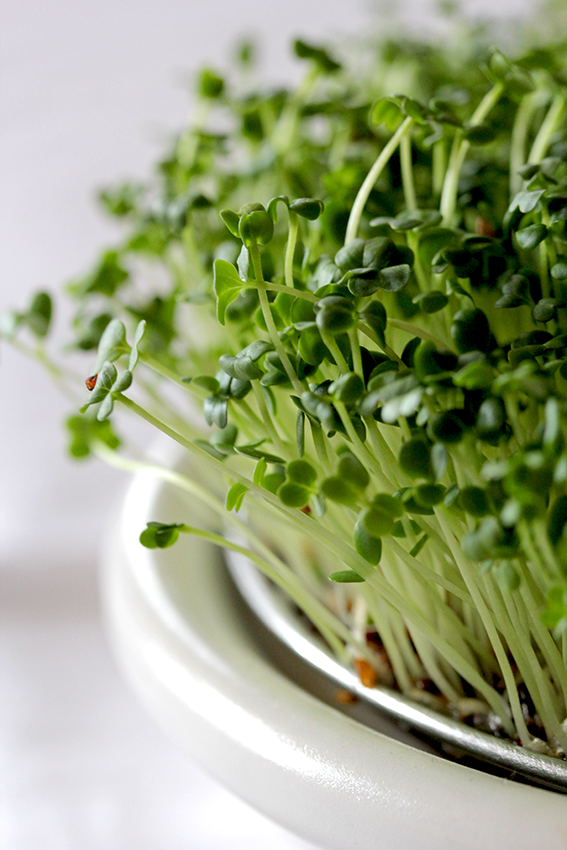
As of late I’ve become quite a fan of white, also known as cannellini, beans. I always thought that I love chickpeas so much that nothing (well, at least no other legume) could have a place next to them, but I recently had the chance to try some organic and traditionally, and quite high up in the mountains, farmed pulses from Umbria in Italy – they were so good! Nothing like the canned stuff from the supermarket! As you know, I like to soak or sprout and then cook pulses in bulk, so that I can use them during the week in many different dishes. You could also double the quantity of the filling if you feel like some extra height is needed for some especially celebratory occasion.

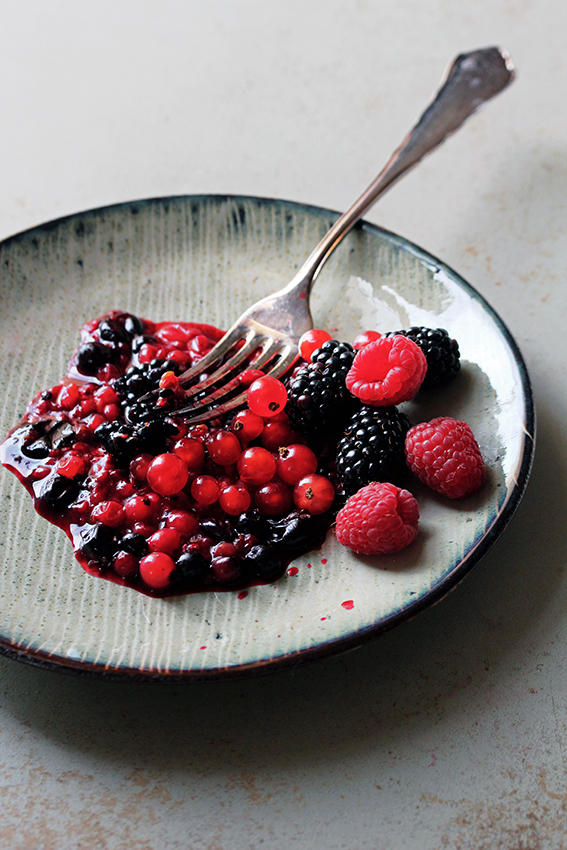
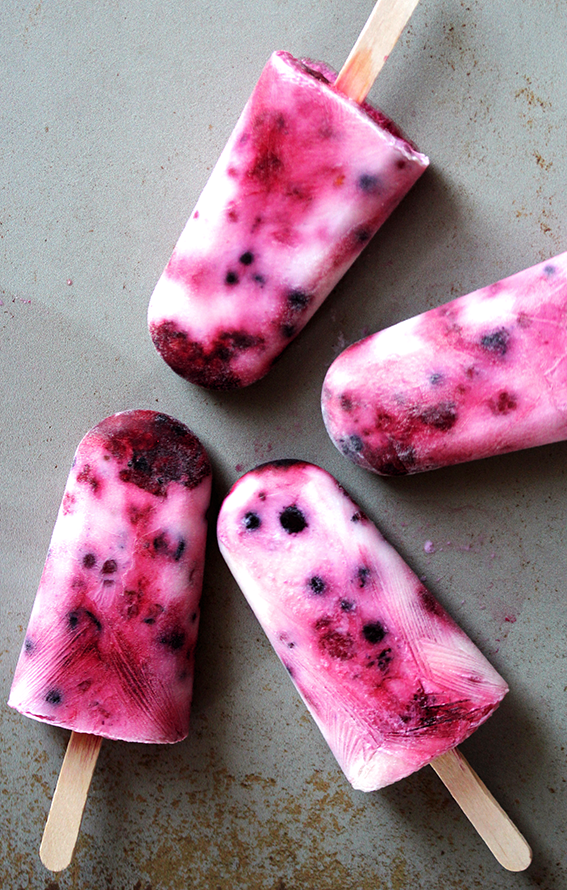
So it’s a good cake – you get it. But what I really love about it, is that it is seasonal. You can make it and top it with whichever fruit is in season. I think it would go especially well with slowly roasted rhubarb and all kinds of berries (I’m thinking blueberries, gooseberries, raspberries or currants) in spring and early summer. Then of course with apricots or peaches as well as with plums and figs in late summer. How cool is that!?

No Bake Apricot Summer Cake // From Hand To Mouth
For the crust

50g (½ cup) pistachios (or other nuts, macadamia would work well)

80g (½ cup) almonds

60g (½ cup) rolled oats (substitute with desiccated coconut for a paleo version)

2 tablespoons coconut oil

1/4 teaspoon sea salt

zest of 1 organic lemon

For the filling

250g cooked white beans (1½ cups)

2 tablespoons rice malt syrup

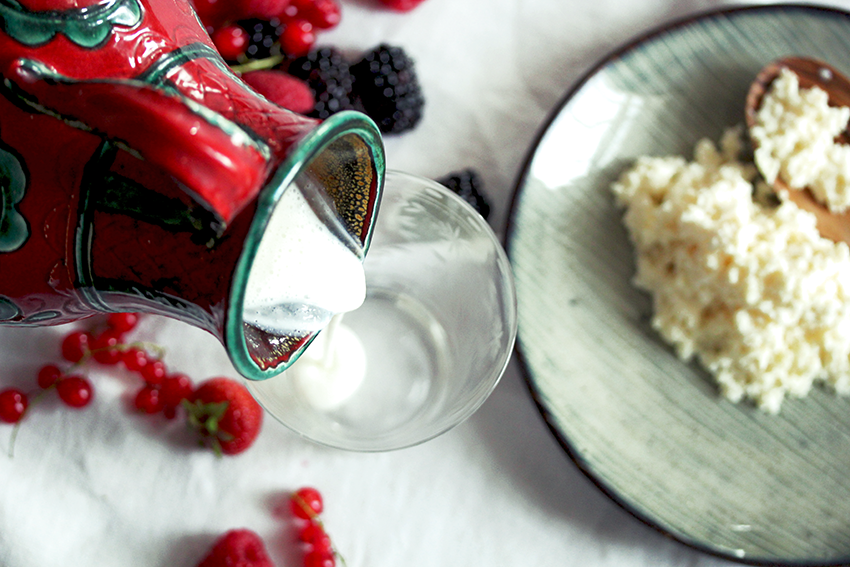
80 ml (1/3 cup) homemade(!) almond milk (or coconut milk)

1 vanilla bean (or 1 teaspoon ground vanilla powder, sugar-free)

20g (1/4 cup) cacao butter

tiny pinch of sea salt

dash of lemon juice

Topping

3 apricots

dash of lemon juice

small handfull of pistachios

pinch of vanilla

1 teaspoon rice malt syrup

1 tablespoon dried rose petals (optional)

Start by making the crust. Place the oats in a food processor and grind them until  they resemble a rough flour and set aside. Roast the nuts in a pan without oil (you can use roasted and salted pistachios just remember to taste before you add any more salt to the mixture). Place them in a food processor and pulse a few times until they have a sand like texture and start to release the fat. Don’t go too far though or you’ll end up with nut butter. Mix all ingredients  in a bowl with your hands until they come together. Line the bottom of a 20 cm (8 inch) springform pan with parchment paper and press the mixture into it. Use your hands to firmly press down the mixture evenly. Place it in the freezer and continue with the filling.

Melt the cacao butter and scrape the vanilla bean. Add the cooked beans (you can use canned beans though I would recommend to soak dried beans overnight in acidic water and then cook them – you can cook a larger quantity and use the beans for other dishes like salads or soups) and all the other ingredients to the food processor an pulse on high speed for about two minutes until you’ve got a smooth mixture. Add a little more sweetness or a little more lemon juice according to taste. Pour the filling into the springform pan on top of the crust and place it back in the freezer for 2-3 hours.

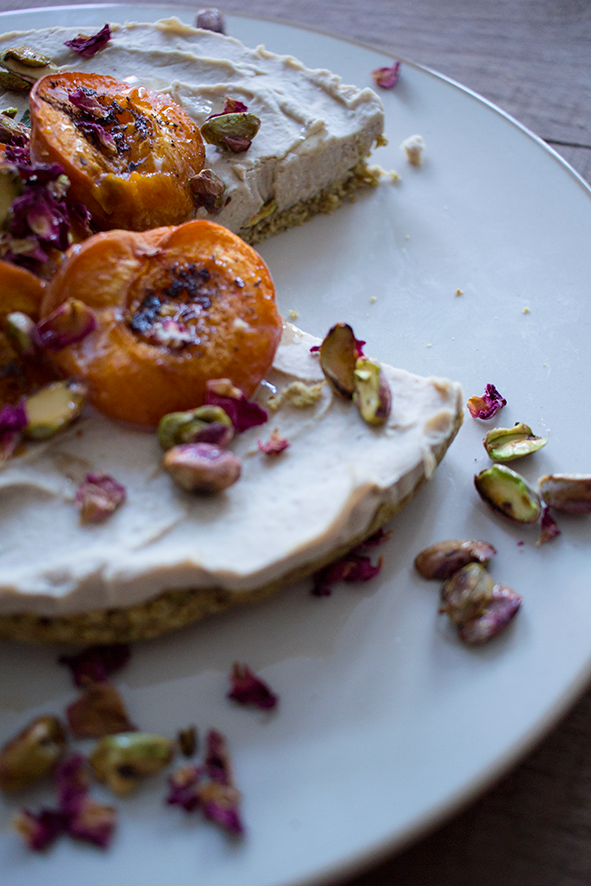
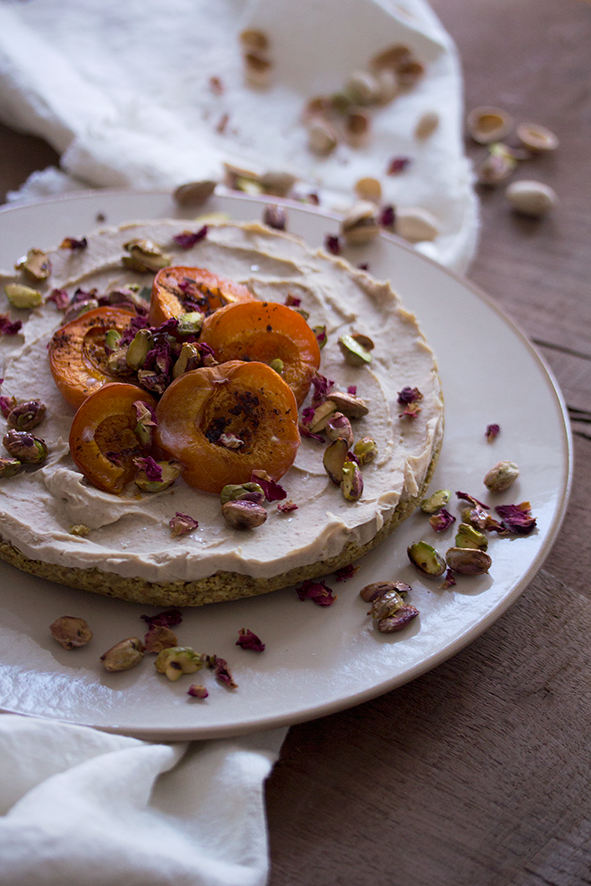
To decorate the cake, halve the apricots and place them in an ovenproof dish, drizzle with a little lemon juice and sprinkle with vanilla. Place the dish in the oven and roast the apricots on very low heat (aprox. 120°C) for about 45 minutes until they’ve become soft but still retain their shape. Let them cool slightly.

Remove the sides of the springform pan while the cake is still frozen. You can store it in the fridge for half an hour before serving it if you want it to be creamier. Place the cooled apricots in the middle of the cake. Roast the pistachios in a pan without oil and drizzle them with a little rice malt syrup in a small bowl so that they are coated. Sprinkle on top of the cake together with some rose petals if you wish.

The Appreciation of the Special

This is not a new recipe since I didn’t do anything much else than heat up my iron pan. It’s not more nor less than appreciating something special – in this case a good piece of meat.

Special because I’m not often preparing meat (and funnily enough the first pork chop I ever made) and special because it’s the meat of an old breed, the Schwäbisch-Hällischem Landschwein (Swabian-Hall swine), which you can get here in Berlin from Kumpel & Keule, a butchery located at Markthalle Neun. And yep, they sell it with that much fat out of conviction. The meat’s beautifully marbled, and the fat keeps it moist and flavourful.

For now, I’ll leave it at that. I didn’t plan to take any photos or write much, but couldn’t help myself, maybe because it turned out to be such a beautiful example for taking care about the quality rather than the quantity.

I didn’t brine the chop (though dry brining is definitely something I’m going to try out soon). I just added a little salt and pepper, seared it in a hot iron pan, placed it under a lid in the preheated oven for about 10 minutes, let it rest for about 5 minutes and fried some sage (ok, quite a lot) in the remaining fat.


Plum & Pistachio Crumble With Labneh

On this blog I really talk rather a lot about looking forward to the appearance of certain produce. I realize that. And while this might seem like some manic quirk it really is the result of cooking with an appreciation of the changing seasons. Obviously nothing is as great as the first fresh spring produce after a long dark winter, but, heck, autumn has so much that I love to offer as well! I mean: pumpkins! Do I need to say much more!?  Mushrooms, especially chanterelles! Chestnuts! Apples! Not the boring all year round available overseas apples, but really crisp and tart ones. And last, but not least one of my favourite fruits: the humble plum.

I love them most when they are still slightly underripe. The sweeter they become, the less interesting I find them, but maybe that’s just me. Gosh, I could eat them by the kilo. Which I used to do, but the great thing about quitting sugar is, that you become more mindful about fruit (everything sweet really). It becomes a real treat and also tastes much sweeter.

Plums

Here in Germany nothing is more typical for the late summer season than a plum tray-bake with a yeast dough that is often served with whipped cream. Whether it’s is topped with crumbles on the other hand, depends on the family recipe. But who doesn’t love crumbles? My family certainly does… However the dough tends to be rather dry or gets easily burnt from underneath. For all I care, I can happily live without it, which might be why I’ve always been such a fan of the English crumble.

Making crumbles, or Streusel like we say here, out of nuts is not just easy, but incredibly delicious (and of course gluten-free). This pistachio crumble is SO good everyone else was lucky it made it from the bowl into the oven! I always like to add a quite generous pinch of salt to my crumbles or any short crust pastries – in this case I used salted pistachios and although I was worried it would be too salty, it was just absolutely delicious along the plum’s sweetness! Regarding the spices, it would be more common to use cinnamon, but the cardamom adds a freshness that lifts the dish and brings it all together. I once had a very cardamomy rhubarb crumble on a market in Copenhagen, which I absolutely fell in love with. Needless to say, that I’m also a lover of the cardamom heavy traditional Swedish Kanelbullar. You get the idea: I love cardamom in baked goods, but here it’s an absolute necessity!

You can make the crumble without the labneh – and make it vegan – but I found, it added a welcome creamy texture. If you can’t be bothered making your own labneh, you might use thick (10% fat) Greek style yoghurt instead. But if you suddenly become a fan of labneh, like me, you could give this absolutely delicious labneh with roasted rhubarb & liquorice a try. Oh wait – you’ll have to wait ’til spring…Do you now see, what I meant with looking forward to the changing seasons?

Plum & pistachio crumble with labneh // From Hand To Mouth

Plum & pistachio crumble (serves 6)

800g plums

500g plain full fat yoghurt (cow’s, sheep’s or goat’s milk)

1 vanilla pod

zest and some juice of 1 organic lemon

1 tsp rice malt syrup or stevia granulate

1/4 tsp of sea salt

a handful pistachios

For the crumble topping

100g (1 cup) shelled pistachios (preferably roasted and salted)

1 tbsp butter (or coconut oil)

1 tsp rice malt syrup

1 tsp cardamom

It’s best to drain the yoghurt overnight to get really thick and creamy labneh (4-6 hours might work as well if you are pressed for time). So, start one day ahead by lining a strainer with a clean cheesecloth or muslin. Place it over a bowl (or your kitchen sink) and pour the yoghurt into the cloth. You can form a bundle and squeeze it from time to time to accelerate the process.

On the next day, remove the labneh from the cloth and place it in a bowl. Scrape the vanilla pod and mix labneh with the vanilla, lemon zest, a little of the lemon juice, stevia or rice malt syrup and the sea salt – be generous or it’s going to taste rather bland.

Preheat the oven to 160°C. Wash and halve the plums. Place the halves upright one line after another in a baking dish (I used a rectangular 20cm x 30cm dish). Drizzle them with some more lemon juice and dot them by the spoonful with the labneh.

For the crumble I used roasted and salted pistachios. If you’re using raw pistachios lightly roast them in a pan without oil (and a generous pinch of salt to the mix later!). Place the pistachios in a food processor and grind them until you’ve got a sand like texture. Add the other ingredients and pulse to combine. Use your hand to form crumbles. The texture should be that of ‘normal’ crumbles. If it’s not, add some butter and/or rice malt syrup.

Crumble the mixture over the prepared plums and top with some a handful of whole pistachios. Place the dish in the oven and let it bake for 25-30 minutes until the crumbles have become golden and the plums started to loose some of their juices. Serve warm or cold.

Plums & pistachio crumble

Sardine & Kale Stuffed Heirloom Tomatoes

How do I come up with new recipes? I don’t sit at my desk and make them up, rather they just seem to come together all by themselves when I stroll over the market. Although this may sound corny, I truly let myself be inspired by the seasonal produce. That moment when I find something new or especially beautiful is when it all comes together. Last year I had such a moment when I found a bag of zucchini flowers on the market.

Cavolo nero

This year I’m working at a (yet) secret project for the Markthalle Neun in Berlin Kreuzberg – I’ll keep you posted. I get to see and often to taste the freshest regional produce – coming right from the fields of Brandenburg to the city. I was lucky enough to get my hands on some beautiful heirloom tomatoes and again there was this moment! Suddenly this Italian inspired summer dish came together, packed with gorgeous Mediterranean flavours of the ripe tomatoes, cavalo nero, olives, sardines, thyme and savory. I assume it would have been more classic to use breadcrumbs instead of the hazelnut meal, but trust me – the nutty flavour is perfect here, especially if you serve the tomatoes along the beans and roasted hazelnuts like suggested. I also had some cavalo nero left over which I simply sautéed together with the beans. Any greens or a light salad will work nicely as a side dish here.

Sardine & Kale Stuffed Heirloom Tomatoes (serves 5)

5 large heirloom tomatoes

small bunch (ca. 80g) of Tuscan kale (Cavalo nero)

1 tin (125g) sardines

80g pitted black olives

50g (1/2 cup) hazelnut meal

2 garlic cloves (+ 3 more to scatter around in the baking dish)

1 tbsp nutritional yeast

a few thyme springs

dash of lemon juice + 1 tsp lemon zest

1 tbsp olive oil

sea salt and black pepper to taste

Serve with:

1 kg green beans

1 bunch of savory

ca. 30g hazelnuts

1 tbsp butter or olive oil


Sardine & Kale stuffed heirloom tomatoes

Preheat the oven to 200°C. Cut a hole into the top of each tomato, remove the stem, but keep the top as a ‘lid’. Carefully scoop out the insides of the tomatoes (you can use it for sauces). Season the insides with salt an pepper and place the tomatoes in an oiled ovenproof dish or on a lined baking tray.

To make the filling, either use a food processor or chop the kale, two of the garlic cloves and the olives. Crush the sardines using a fork. Roast the hazelnut meal in a pan without oil, being careful not to burn it. Mix all ingredients in a large bowl and add lemon, nutritional yeast, thyme and pepper (add salt as well if you like, but keep in mind that the sardines and the nutritional yeast have already a lot of umami flavour).

Stuff the tomatoes with the filling. Place the ‘lids’ on top and drizzle the tomatoes with olive oil. Half the remaining garlic cloves and scatter them around the tomatoes along with some more thyme springs. Place the baking dish in the oven and roast the tomatoes for about 30 minutes until they are softened.

Meanwhile trim the beans and steam or cook them until they’ve become tender, but still have some crunch. Drain them. Half a few of the hazelnuts and roast all of them in a pan without oil, set aside. Melt butter in a pan and sauté the beans, add the chopped savory, the hazelnuts and season with salt and pepper.

Take the tomatoes out of the oven and serve them along the beans or let them cool down and serve at a buffet or brunch.


Cauliflower steaks with two versions of watermelon salsa

It’s been super hot in the past few weeks here in Berlin. The perfect time for salads, chilled soups, zingy berry popsicles and of course outdoor barbecue! I remember the parks of Berlin, especially the Tiergarten, to be filled with the delicious odour of the big Turkish barbecue parties. Apparently this has been forbidden years ago and my childhood memories of the summerly Tiergarten differ greatly from the tourist site it is now. However, even if you live in a big city I’m sure you’ll find a nice spot to get the barbecue going whether it’s the garden of a friend or a nice spot in a park or on a lakeside. And today we won’t be grilling plain old steaks, but delicious cauli ‘steaks’ with a super refreshing salsa of everyones favourite summer fruit: watermelon! YEAH!

cauliflower steaks and watermelon salsa

I guess I’ve already mentioned how much I love cauliflower. Yes, like the other members of the brassica family it’s super healthy and all, but man, it does taste good. It’s definitely my favorite roasted veg – I like to season it with ‘warm’ spices like cumin, turmeric and nutmeg and then combine it with fresh things like herbs, fruit (like in my cauliflower and rhubarb salad) or yoghurt. So good! And of course you can also roast the cauliflower in the oven for this recipe, if you don’t get the chance to grill it outdoors.

Golly, watermelon, mint and feta is a match made in heaven. I first came across the flavour combination of watermelon and feta thanks to a recipe of baked Feta with watermelon and chili oil in Maria Elia’s The Modern Vegetarian. We made it in my old flat share and were blown away. So I made two versions of the watermelon salsa, because I couldn’t decide for just one – they are both so good in their own way. The first one is my reference to the Mediterranean and the second one is inspired by another summer favourite of mine: Peruvian ceviche. Both salsas are super light and refreshing and not only a great accompaniment for roasted cauliflower but also for grilled meat. Trust me, you’ll love it! It’s also way more impressive than the ordinary potato salad that you often find on  barbecue parties. One of the salsas is enough for about 4 people, so you may want to use two heads of cauliflower if you don’t serve any meat cuts alongside.

Cauliflower steaks with two versions of watermelon salsa

1 -2 heads of cauliflower (depending on how many people you plan to feed – one head only renders 3-4 ‘steak’ like cuts)

1 tbsp coconut oil

sea salt and chili flakes to taste

1) Watermelon salsa – Mediterranean style

1/4 watermelon (300g net)

100g ripe cherry tomatoes

100g  black olives

100g caper berries

130g Feta cheese

1/2 small red onion

small bunch of basil

1 tbsp high quality olive oil

1/2 tbsp white wine vinegar

1/2 tbsp lemon juice

sea salt and black pepper to taste

watermelon salsa

2) Watermelon salsa – Peruvian style

1/4 watermelon (300g net)

1 avocado

1/2 cucumber

1 small bunch of mint

1  small bunch of coriander

juice of 1 lime

1 tbsp avocado oil (or use olive oil instead)

sea salt and chili flakes to taste

Preheat the oven to 180 °C or get your outdoor barbecue ready. If you’re making the Italien style watermelon salsa, start by finely slicing the red onion and allow some time (ca. 30 minutes) to marinate it in the vinegar. This will make its taste less overpowering.

Remove the leaves of the cauliflower. Cut the cauliflower from top to base into thick slices, 2-3cm thick “steaks.” Try to get them as intact as possible and reserve any loose florets for another use. Brush the steaks with coconut oil and season with sea salt and chili flakes. Line a baking sheet with parchment paper, carefully place the cauliflower steaks on it and bake for about 30 minutes until they start to become tender. Or gently grill them on the barbecue.

Basically all you have to do now is finely chopping all the ingredients. I left my salsa rather chunky, but there is no right or wrong here.

When the cauliflower is nicely roasted, place it on a platter and top with the salsa. For the Italian version: crumble the Feta on top and drizzle with a good glug of high quality olive oil.

Watermelon Salsa with Cauliflower Steak // From Hand To Mouth


Chilled Kefir-Cucumber Soup with Walnuts

I don’t know about you, but I found this summer here in Berlin particularly HOT. Too hot to cook, actually even too hot to eat. Not surprisingly the best solutions for such circumstances come from the Mediterranean. I’m thinking of cold soups like the classic Spanish Gazpacho or refreshing yoghurt drinks like Ayran. This recipe is the perfect combination. In Bulgaria and Turkey it’s known as Tarator. My grandma, who usually treats us with Marillenknödel (Austrian apricot dumplings) at this time of the year, recently served us this super refreshing soup instead. It can be made within minutes and keeps well in the fridge – so it’s the perfect summer recipe when you don’t want to spend much time in the kitchen.

What is more: the soup is also very gut friendly. You can use store bought kefir for this recipe, but I encourage you to give the practice of making kefir at home a try. I’ve written up a complete guide how to make your own kefir here. Whether you’ll use kefir or yoghurt, you’ll sure get an extra dose of probiotics. I also find myself craving salty, yet fresh things, when it’s crazy hot like this – maybe this is my body’s way of telling me to make up for the lost minerals – and this soup is the perfect answer. I served it along some antipasti like olives and stuffed wine leaves – a delicious combination and a great way to dream yourself to the shores of the Black or Mediterranean Sea.

Chilled Kefir-Cucumber Soup with Walnuts (serves 4)

750 ml kefir (alternatively use 500ml Greek yoghurt & 200-250ml milk or water)

2 cucumbers

1 big bunch of dill

1 small bunch of mint

1-2 garlic cloves

1 handfull of walnuts

1-2 tbsp olive oil

1/2 tsp sea salt and coarse black pepper to taste

Chilled Cucumber Soup with Mint // From Hand To Mouth

If you’re using homemade kefir, start by preparing it in your usual way. Grate the cucumbers. Set a few mint leaves and dill springs aside for the decoration. Then chop the herbs and the garlic cloves (the garlic flavour becomes stronger over time, so you might want to be careful here). Mix everything in a large bowl and season with salt and pepper. Keep the soup in the fridge until you’re ready to serve it. It taste best, when it’s really rather cold.

Roughly chop the walnuts and roast them in a pan without oil. To serve, generously drizzle the soup with high quality olive oil, sprinkle with the walnut and decorate it with the remaining herbs.


Gooseberry Galette with goat’s cheese & sage

As if the sun and the prospect of a swim in the lake or the sea wouldn’t be enough, summer has to offer all kinds of berries in abundance! Every year I am especially looking forward to get some gooseberries and this year we even had some on the balcony. Normally I like them as tart as possible, but I found these red gooseberries, which are sweeter, on the market and just had to try them out, but this recipe is equally delicious with green ones. Because of their tartness gooseberries are – like rhubarb – the perfect accompaniment for short crusts or puff pastry either savoury or sweet. They are divine along yoghurt or quark desserts and of course with meringue…hmm.

This galette can serve as an afternoon tea treat, as a light summer meal and is perfect for picnics in the park. The nutty flavour and coarse texture of the crust, the tart and yet sweet berries and the slightly salty goat’s cheese taste divine. And believe me, like I said before, sage and thyme go along very well with a little sweetness and round it all off.

Gooseberry Galette with soft goat's cheese & sage //From Hand To Mouth

If you want to try out this delicious flavour combination, but don’t care about a gluten-free crust, you can make the galette with this fool proof short crust pastry:

  • 250 g all purpose flour
  • ½ tsp salt
  • 130 g butter
  • 90 ml water

The result will look less rustic and will not be as nutty – therefore don’t be stingy with the walnut you sprinkle on top. Either way, enjoy the berry galore while it lasts!

Gooseberry Galette with goat’s cheese & sage

For the crust

100g buckwheat flour

50g oat flour (or rolled oats grounded with a food processor)

50g walnuts

2 tbsp arrowroot powder (can be substituted with corn starch)

60g cold butter

4 tbsp cold water

1 egg yolk

ca. 10 springs of thyme

1/3 tsp salt

For the filling

120g goat’s cream cheese

300g gooseberries

a few more walnuts

5 thyme springs

10 sage leaves

a pinch of freshly ground black pepper

1-2 tsp honey (optional)

Gooseberry Galette with soft goat's cheese & sage //From Hand To Mouth


Pulse oats and walnuts successively in a food processor until you’ve got a sand-like texture. Mix all the dry ingredients in a large bowl. Add COLD butter, COLD water and the egg yolk, mix thoroughly with your hand and form a ball. Place the dough ball in the fridge for 30 minutes (don’t keep it too long in the fridge or it will become brittle).

Preheat the oven to 170°C. Wash and trim the gooseberries. Roll out the chilled dough in between two sheets of parchment paper. You don’t have to be neatly, if you want the galette to look as rustic as mine. Spread the dough with the goat’s cheese except for the edges. Place the gooseberries on top and sprinkle with thyme and sage leaves, a few walnuts and black pepper (if you like it a little sweeter drizzle with a little honey). Fold the edges up around the gooseberries. Carefully place the parchment paper with the galette on a baking tray and bake it for ca. 20 minutes until the crust becomes golden and crisp.

Gooseberry Galette with soft goat's cheese & sage //From Hand To Mouth


Grilled Romaine with Roquefort Dressing & White Currants

I guess by now it’s pretty obvious that I love the combination of fruit with savoury flavours. Like the rhubarb and thyme combination in my goat’s cheese & rhubarb parcels, strawberry and basil in the asparagus-strawberry salad with za’atar-goat’s cheese ‘gnocchi’ or blueberries and pink pepper like in my purslane salad with blueberries. But when I look at all these recipes what holds them together and to what my mind seems always to be drawn is the cheese. It’s no secret that I love cheese, especially goat’s cheese. For me it’s not the cheese that becomes even better when combined with fruit, but the fruit that’s even more delicious together with some cheese. I’m think of peaches and creamy goat’s cheese….mmhhh.

Grilled Romaine with Roquefort Dressing & White Currants

However I’ve not always been so cheese obsessed. Like many children I despised blue cheese, even thought it to be quite disgusting. Now it’s one of my absolute favourite foods around – the stronger the better. And oh my god, this dressing is DE-LI-CIOUS. Depending on your taste, you can vary the cheese to get a more mild or a sharper flavour. The creaminess of the dressing goes very well along with the nutty freekeh, while the dandelion’s bitterness and the sweet, yet tangy berries cut through its richness.

No one had to convince me to love berries though. Even if I’d be very hard pressed, I’m not sure that I could name a favourite. Even among white, red and black currants I could not possibly choose. For this salad I waa looking for a light colour combination of all shades white and green.

Grilled Romaine with Roquefort Dressing & White Currants // From Hand To Mouth

Grilling lettuce might seem a little weird at first, but you will soon agree, that it’s a very good idea indeed. In winter I already made something similar when I caramelized chicory (Caramelized chicory citrus salad), now it’s the romaine’s turn.

Grilled romaine with Roquefort dressing & white currants 

2 romaine lettuce hearts

1 bunch of dandelion leaves (can be replaced with rucola or other bitter greens)

80g freekeh (or spelt berries)

a handful white currants

1 small avocado

1 tbsp olive oil

freshly ground black pepper and sea salt to taste

Roquefort Dressing

100g Roquefort (or the blue cheese)

2 tbsp olive oil

juice and zest of 1/2 lemon

1 tbsp white wine vinegar

2 tbsp water

freshly ground black pepper to taste

Grilled Romaine with Roquefort dressing & white currants // From Hand To Mouth

If possible, soak the freekeh overnight (read more it about why soaking grains is a good idea here). Cook it using fresh water until tender, but still has got some crunch, which should take about 25 minutes.

Slice the avocado. I always like to ‘marinate’ it during the time it takes to make my salads with a drizzle of lemon juice and some salt (but remember that the Roquefort dressing is rather salty already).

If you want to grill the romaine outdoors, get the barbecue going to medium heat. Half the romaine lettuce lengthwise thereby being careful to leave the halves as intact as possible. Wash the romaine halves and the dandelion and pat dry. Brush the romaine with the olive oil and slightly rub with a little salt and pepper. Place the halves, cut-side down, either on the barbecue or in a grill pan. Grill the romaine on medium heat, turning once until nicely charred for about 5 minutes.

Set a little bit of the cheese aside to sprinkle over the salad at the end. To make the dressing, simply mash the rest of Roquefort with a fork. Add the other ingredients and whisk together.

To assemble, mix the dandelion leaves with the freekeh and a bit of the dressing. Top with the romaine halves and the avocado. Drizzle more dressing on top and sprinkle with Roquefort crumbs, the white currants and coarse black pepper.

Grilled Romaine with Roquefort dressing & white currants // From Hand To Mouth


Chilled kohlrabi soup with cashew horseradish cream & cress oil

If someone would ask me to name my favourite vegetable I really couldn’t choose just one. But what I could say is this: I’m a lover of the Brassica family. I know this may sound weird, but I LOVE cauliflower, broccoli, savoy cabbage, kale, brussel sprouts and not least of all: kohlrabi. Kohlrabi is one of the most common veggies here in Germany, but seems to be relatively unknown in the anglo-saxon world. Whether you are bored of the old bulb or a kohlrabi newbie: reconsider and get some at the market. They are super healthy – especially the edible leaves that taste great lightly sautéd with nothing but a little salt and butter – and versatile. Raw, kohlrabi is the perfect complement for grated salads – it’s fresh and crisp, similar to water chestnuts. But I also love it sautéd with butter and salt. The taste becomes ‘warmer’ and a little sweeter. It’s a great addition to abundance bowls or works well as a taco filling. You could also try my spelt tagiatelle with caramelized kohlrabi and rhubarb.

In the past very hot days all I was longing for was something cooling and refreshing, something that would make me feel satisfied without feeling full. So if you fancy a change from smoothies or salads, chilled summer soups are the perfect option. Traditional kohlrabi soups often call for heavy cream or flour as a thickener, but such a richness was the last thing I wanted. If you haven’t added avocado to a soup before: It’s the perfect vegan and paleo way to thicken soups – there’s no need for starch or potatoes! Simply add it after you’ve blended the other ingredients so that they have cooled down a little – there you go.

Chilled kohlrabi soup with cashew cream & cress oil // From Hand To Mouth

One more thing about the cress, I used for that recipe: You can of course use store bought cress, but maybe you want to start growing your own sprouts. A couple of years ago, I started sprouting seeds, legumes and grains in a jar, which is super easy and a great way to optimize nutrition. However sprouting jars don’t work for tiny seeds like broccoli and radish, especially if they are gel-forming like cress and chia seeds. Of course you can easily sprout cress on slightly moist cotton, but I decided to get myself a sprouting tray (like this one. If you are in Germany: I got mine here). All you have to do is to sprinkle the seeds with some water twice a day and after a few days you’ve got a tray full of leafy sprouts packed with blood-cleansing chlorophyll.  You can use any leafy sprouts you like for this recipe, but I really recommend pungent sprouts such as cress, mustard, arugula or radish, because they add some bang to the rather mild soup.

Chilled kohlrabi soup with cashew cream & cress oil

1 kg kohlrabi (3 big bulbs)

1 avocado

2 shallots

2 litre homemade vegetable or chicken broth

1/2 tsp freshly grated nutmeg

sea salt and freshly ground black pepper to taste

1 tbsp coconut oil

For the cashew cream: 

150g cashews

180-200ml water

thumb-sized piece of horseradish

juice of 1/2 lemon

pinch of nutmeg

sea salt and black pepper to  taste

For the cress oil:

a generous hand full of cress (or radish sprouts)

5 tbsp good quality olive oil

a pinch of salt

Chilled kohlrabi soup with cashew cream & cress oil // From Hand To Mouth

Cover the cashews with water and soak them overnight or at least 2 hours beforehand.

Peel and dice the kohlrabi (don’t throw out the leaves! You can use them in the soup, although this will darken the result or sauté them like collard greens or kale and eat them with some eggs). Dice the shallots. Place a large pot on medium heat, add the coconut oil and sauté the shallots until they become translucent. Add the kohlrabi and the spices and stir fry for about 2 minutes. Then add the broth, bring to a boil and let it simmer for not more than 5 minutes. When you overcook brassicas, you’ll get that sulfuric, ‘cabbagy’ smell which is the reason many people don’t like these great veggies. Meanwhile chop the avocado. Remove the soup from the heat and blend it until smooth. Let it cool down a little, than add the copped avocado and blend again until you’ve got a creamy texture. Place the cooled down soup in the fridge for at least two hours.

To make the cashew cream, peel and grate the horseradish. Discard the soaking water and blend all ingredients with a blender or food processor. I wanted the cream to be rather thick, you might want to add a little more water until you’ve reached your favoured consistency.

For the cress oil, place the sprouts, 3 tbsp olive oil and salt in a food processor or an hand-held blender and pulse a few times, but try to keep some of the leaves intact, then add the remaining oil.

Ladle the chilled soup into bowls, stir in the cashew cream, drizzle with the cress oil and sprinkle with some more sprouts.

* You can also serve the soup warm – it tastes just as good!


Homemade Kefir & Berry Ice Pops

At last we had some real summer days here in Berlin. A little too hot for my liking, especially if you have to spent them in the city. When it’s so hot that you don’t feel like eating anything at all, but long for some refreshment, this is for you. Luckily summer provides us with its own version of a cooling treat: berry galore! There is nothing quite like light and refreshing berries. I find it impossible to name a favourite. Raspberries, strawberries, currants…I went for the mix. However, I often find myself craving something salty and yet fresh. In this case tart, cultured dairy products are my go-to option. Ayran, chilled cucumber yoghurt soup or my green smoothie with my homemade kefir.

Kefir originates in the Caucasus and most of you, at least here in Germany, will know it from the supermarket as a slightly tart and fizzy dairy drink. You can use store-bought kefir for to make the berry ice pops, but I encourage everyone who has a crush for cultured dairy products like natural yoghurt to make your own. It’s super easy, requires no fancy equipment and once you bought (or have been gifted with) your culture you can use it over and over again. I grew so fond of my kefir grains that I think of them as something like a pet that has to be fed and taken care of. Some might find this too time consuming and annoying, but I don’t want to miss having my super tart kefir at hand (the downside is that I’m finding store-bought natural yoghurt too bland now – but that’s just me).

What’s so great about kefir despite its taste? Like other fermentation methods cultured dairy products such as yoghurt, buttermilk and kefir are a way to preserve fresh milk. Since the advent of the refrigerator this might seem unnecessary, but the kefir culture, also called kefir granules or kefir ‘grains’ because of their appearance, turns the milk into a real super-food. Although the taste of kefir can resemble yoghurt it contains completely different microorganisms. The kefir granules contain about 30 different microorganisms and are a symbioses of yeast and bacteria (lactobacillus kefiri). But don’t fret, they don’t feed yeasts in your gut – on the contrary there is little else that is so beneficial for your gut like kefir. The beneficial probiotics in the kefir can inhibit the growth of harmful bacteria and are therefore a great support for the immune system. Kefir is also easily digested, because the protein in the milk becomes partially broken down during the fermentation process and what is more: kefir is very low in lactose because the culture feeds from the milk sugar (i.e. lactose) and converts it into lactic acid. It can therefore often be tolerated by people who otherwise have trouble with dairy products. Kefir also contains many vitamins, especially Vitamin K2 that is important for bone health and B vitamins, as well as beneficial minerals. You can read more about the health benefits of kefir here.

How to make your own kefir

You will need:

1-2 tbsp kefir grains (if you don’t know anyone with some spare kefir grains, you can buy them online. If your in Germany: I bought mine here)

500 ml full fat milk (cow’s, goat’s, sheep’s milk – they all work)

a wide mouthed 1 litre glass jars with a lid

a fine plastic strainer (although I avoid using plastic in my kitchen, the kefir culture is said to suffer from the contact with metal)

a wooden (or plastic) spoon

Sterilize the jar with boiling water. Fill milk into the clean jar. Add kefir granules and stir with a wooden spoon or spatula. Cover loosely with a lid (the kefir becomes effervescent, so don’t close the lid too tightly or pressure will build up). Let the mixture sit for 12-48 hours. You will see that the thick curd like kefir mix separates from the whey. You may want to stir the mixture occasionally, but this is not absolutely necessary.

Pour the kefir through a strainer into a bowl or another jar to remove the grains. Don’t be afraid to squeeze the granules to obtain as much kefir as possible. Clean and sterilize the jar, add new milk and return the granules  – and the cycle begins anew.

kefir

Depending on the temperature, the time and the ratio of kefir grains to milk the taste and consistency differs. Generally: the less milk you use the faster the fermentation process becomes, also the more kefir grains you use and the longer you keep the kefir on the shelf the more tangy and fizzy it will become. Higher temperatures speed up the process as well, but also change the flavour. In lower temperatures the yeast predominates resulting a more carbonated and slightly alcoholic kefir, whereas in higher temperatures the lactobacilli prevail so that the kefir becomes more tangy and yoghurt like. The process of adjusting those three parameters involves some trial and error, but eventually you will end up with delicious kefir that suits you individual taste. That my kefir is a living culture that grows and changes with the seasons is what makes the whole thing so fascinating.

You can make kefir from any animal milk. Some say, you can also use coconut or almond milk, but the culture will suffer and after a few cycles will have to be returned into dairy milk to be revitalized. I once tried coconut milk, but I have to say that I didn’t like the result. If you want to have a dairy free kefir, I suggest you try water kefir to which you have to add a different culture and some sugar to feed it. You can read more about making kefir here, there also is a helpful video.

Kefir & Berry Ice Pops // From Hand To Mouth

Kefir & berry ice pops

250-300ml kefir

100g berries (I used a mixture of raspberries, blackberries, currants, blueberries and some strawberries)

6 ice pops molds and sticks

Smash the berries with a fork. Fill berries and kefir alternately into the mold. Place the stick in the middle. The mixture should be thick enough for it to keep upright, otherwise place the molds in the freezer for 15 minutes and then put in the sticks. Let the popsicles freeze for at least three hours and enjoy as a dessert or for breakfast on a super hot day!