Caramelized chicory citrus salad

Sitting here, writing this, my very cold feet are a clear reminder that we are in the middle of winter. And yet while I’m a strong proponent of warming soups, stews and oven bakes in the winter months, I felt so much in need of something that reminded me that there will be an end to the grey skies and the sad, muddy brown all around eventually, that I just had to make something colourful and delicate.

While we naturally associate salads with summer, nature has come up with some beautiful winter crops such as some bitter leaf varieties: chicory, radicchio, kale or the even more widely used and loved lamb’s lettuce. And of course winter is the time of the citrus fruit! Last year I made a beautiful blood orange & Swiss chard salad – this year it will be grapefruit. As you may have guessed by now, I’m quite a fan of a little bitterness. From VERY dark chocolate to campari and tons of arugula, it is a flavour I don’t want to miss. I recently stumbled across a whole cookbook dedicated to that least loved flavour – sounds very promising.

If you feel like you have over-indulged in the festive season on sweets, meat or a little too cheesy dishes, I reckon it will feel great to give your taste buds a little change and have something slightly bitter, crisp and incredibly fresh. You might not need a ‘detox plan’ just have yourself this very simple salad – it’s like a glimpse of spring on a plate!


Caramelized chicory & grapefruit salad

(serves 2 as a light meal or a starter)

3 chicory (Belgian endive)

1 pink grapefruit

1 avocado

80g feta or soft goat’s cheese

30g hazelnuts

zest and juice of a lime (organic if possible)

a few basil leaves

1-2 tsp rice malt syrup or aromatic honey

1 tsp fennel seeds

drizzle of good quality olive oil

coconut oil or ghee for frying

sea salt, pepper

chicory citrus salad

Slice the avocado, drizzle with lime juice and some salt and set aside. Cut each chicory lengthwise in quarters. You want to leave the stalk intact for otherwise the leaves will fall apart; it will soften when sautéed. Fillet the grapefruit, try to cut off as much of the white skin as possible for it tastes rather bitter. Carefully grate the lime and set the zest aside. Half a few of the hazelnuts and roast them together with the rest in a dry pan, set aside.

In the same pan heat some coconut oil on medium heat and place the endives in the pan. Season with salt and pepper and trickle the rice malt syrup over the endives. After a few of minutes turn them over, they should turn golden brown, but not be really burnt. In total sautée them for about 10 minutes. Add the fennel seeds a few minutes before the end, so they give some flavour but do not burn.

Arrange chicory, avocado and grapefruit on a plate. Top with crumbled feta, hazelnuts and torn basil leaves. Sprinkle the lime zest over it and drizzle carefully with a little good quality (fruity) olive oil.

chicory citrus salad

Black pumpkin & sage risotto

Happy new year everyone!

Me – I delayed the advent of the new year a little by sorting and archiving old things. Boring, I know. But when I flicked through some old photos, I found something worth to get out of the cupboard: one of the very first dishes I made in order to photograph it with my analogue camera back in early 2012. It is not quite a light ‘detox’ dish, that you, as well as me, might be in need of after too much feasting (I’ve got something in mind there that will appear here soon) – but a real winter warmer. And since it’s likely that cold days are still to come, I thought it might be a nice suggestion. After all it is just a classic – a good old risotto – something you don’t really need a recipe for, which might be nice after all those Christmas menus. It is merely the colour combination of black and bright orange that is giving this risotto a little twist, something that will lighten the mood in the face of a grey and cloudy sky.

So although you can get an equally delicious result when using white risotto rice, I suggest to give the black rice a try. There are two varieties of black rice of which one isn’t botanically real rice at all, but comes from a water grass and is called wild rice. The grains are long an thin and therefore not suited for making risotto. What I used is black Venere rice from the Piemont, that, despite being black, looks very similar to the classic north Italian Arborio rice. Unlike the classic risotto rice it is unmilled with the black husk intact. This of course has the benefit that the nutrients and fibers found in this outer layer are still present. On the other hand  I had my doubts that it would be possible to achieve the creamy constancy that is the secret of a good risotto. I usually soak all my grains to break down hard to digest phytic acids, of course you don’t have to that, but in this case I’d really recommend that step. Otherwise you might need to cook the risotto for much more than an hour before the rice softens.

Black-pumpkin-risotto

Black pumpkin & sage risotto (Serves two)

200g black Venere rice

1 medium organic pumpkin such as Hokkaido (ca. 500g)

80g old Pecorino or Parmesan

3 shallots

1 clove of garlic

1 glass of dry white wine

ca. 50g butter

1 bunch of sage

2-3 springs of thyme

sea salt & pepper

1 bay leaf

1 tsp turmeric

2 cardamom capsules

Black-pumpkin-risotto

Although this is an easy dish it is worth to start one day in advance with soaking the rice and preparing your own pumpkin stock. You can use vegetable or chicken stock, but making pumpkin stock uses up the scraps and enhances the flavour of the dish. Usually you don’t have to peel a Hokkaido pumpkin, but in this case I shaved off the peel in order to use it together with the pumpkin seeds to make the stock. I just set aside a quarter of the pumpkin that I did not peel, because I wanted to make some crispy pumpkin chips to top the risotto with. Halve two unpeeled shallots. Put a large pot on high heat add some butter or coconut oil and add shallots and the pumpkin’s peel and seeds. You really want to caramelize it to get a very rich roasting flavour. Add some salt, the bay leaf and then cover with 1 1/2 litres of water. Let simmer on low heat for about an hour and then strain the stock through a fine sieve.

Preheat the oven to 180°C. Dice the peeled pumpkin. If you want to make the extra crispy chips, slice the unpeeled part of the pumpkin very thinly. Mix pumpkin with turmeric, salt, pepper and freshly ground cardamom and cover with melted butter or coconut oil. Place on a backing tray – the chips will only take a few minutes, so place them separate from the dices and take them out earlier. Roast the rest of the pumpkin for about 20 minutes until soft.

When you’ve made the stock in advance, reheat it a little on low heat. Drain off and rinse the rice carefully – the rice dyes very, very much! Dice the shallot and the garlic. Grate the cheese. Melt 2 tbsp butter in a saucepan, sauté the shallot, add the rice and start to stir it. When it has soaked up the liquid add wine and stir until it evaporated and then start adding the stock, one ladle at a time. Add the thyme springs and keep stiring. The black rice will take longer than the white one – about 50 minutes. In the meantime melt 2-3 tbsp of butter in a frying pan and fry the sage until crispy. Then place it on some kitchen paper to drain off the exess butter. Taste the rice when it starts to become creamy. It should be soft but still be a little al dente. Remove the thyme springs. Set aside a little of the cheese and add the rest to the risotto. Season with salt and pepper. Because the rice dyes so strong I did not stir the pumpkin in the risotto but placed it on top of it on the plates. Top with sage leaves and grated cheese and sprinkle with coarse black pepper.

Savoy cabbage praline with chestnut-hazelnut filling

Originally I intended to post this recipe way back in autumn. It was inspired by the most curiously looking oyster mushrooms I’d ever seen and hence could walk past. The first savoy cabbage made an appearance as well as one of my season’s favourites: chestnuts!

However, time went by and I started to think about Christmas and what to cook and remembered how incredibly delicious these parcels were (honestly, I sat in awe in front of the empty plate, wondering how I possibly could have  created something like this). To me this would just be the perfect main dish for a vegetarian (or vegan) Christmas dinner. And of course they would also make a wonderful side dish – although they pose a real threat to steel the roast’s show.

A note on chestnuts: I used pre-cooked, vacuum-packed chestnuts, because I had just used up all the fresh ones I bought this autumn (cauliflower and chestnut puree with butter roasted chestnuts on top became a new favourite side dish of mine). And I have to admit that for many, many years I shunned the effort to peel fresh chestnuts, especially since a few years ago my family brought back lots of them from a hiking trip to the ‘Pfalz’ (a German region in the south-west) where one can collect them in the woods. Peeling them turned out to be quite horrific and ended up with a lot of pain from under our fingernails. This year however I learned the perfect trick how to get rid of that nasty peel (it’s the skin underneath the shell that is making this a though one). Make a cross-cut in the flat side of the shell and then SOAK them in some water for at least an hour before you roast them in the oven for about 30 minutes (at ca. 200°C). After that treatment the peeling really is much easier.

Savoy cabbage pralines with a chestnut-hazelnut filling on oyster mushrooms (this recipe will make 4-5 pralines)

1 savoy cabbage

350g oyster mushrooms

130g hazelnuts

200g chestnuts

2 red onions

butter or coconut oil (for a vegan version)

sea salt, black pepper, nutmeg, thyme

kitchen string

Soak 100g of the hazelnuts overnight in water.

Wash the large, outer leaves of the cabbage and cut out the very though stalks at the bottom with a V-cut, but try to keep the leaf as intact as possible. Blanch the leaves for no more than 3 minutes in salted, simmering water and then place them immediately in a bowl of very cold water water or rinse them with cool water in order to stop the cooking process and the keep their green colour.

Purée the soaked hazelnuts with 150ml fresh water. Add 150g of the chestnuts and purée them as well, but leave them a little chunky. Chop 300g of the oyster mushrooms and sauté them in a pan with 1/2 tbsp of butter, salt and pepper. Mix with the puree and generously season with nutmeg.

Finely slice the onions. Using a thick bottomed pan on low temperature, melt a tbsp of butter and very slowly roast the onions. This will take 20-25 minutes. They will slowly soften and become translucent – you can salt them then – and then will turn crispy and brown, but be careful not to burn them.

In the meantime pat dry the cabbage leaves and place three leaves on top of each other so that they are overlapping in the middle. Place 2-3 tbsp of the filling in the middle, form a parcel and bind it up with kitchen string. Place the parcels on a baking tray, sprinkle with a little oil and roast in the oven at 180°C for about 15 minutes in the oven (the cabbage should not dry out too much).

Savoy cabbage praline

Cut a few of the remaining hazelnuts in halves, roast all of them in a pan and set aside. If the remaining chestnuts are very big, half them as well and sauté them together with the whole oyster mushrooms you have left in 1/2 tbsp of butter. Season with salt and pepper.

Arrange the mushrooms and the chestnuts on the plate, place the parcels on top and generously sprinkle with onions and hazelnuts.

Creamy cauliflower-almond soup with smoked paprika butter

Since november has fully arrived with all its darkness and gloom, I have turned to making broth. Years back, I’ve developed a very strong dislike of the taste of dried/cubed bouillon. Only the tiniest bit ruins the best dish in my opinion, for even if it’s not made with glutamate or yeast, I find it has an overpowering artificial taste. At the same time, the idea of using store bought meat stock always disgusted me, since I had no idea where those bones really came from. So for a long time – and because I was often too lazy to make my own vegetable broth – I cooked my soups with mere water. But oh, I have to tell you, what a revelation it was, when I  finally used up my first litres of gelatinous chicken broth that I made using the chicken’s carcass (I know this sounds really ridiculous, considering that this ‘revelation’ would make all our grandmothers laugh). I’ve recently reintroduced (organic) meat into my diet, maybe you’d also like to read about the health benefits of broth here and here. Even if you are vegetarian or vegan it is really worthwhile to make your own vegetable broth for it is such an easy way to pimp your dishes! I have started to collect my vegetable scraps (and bones) in a bag in the freezer (a great tip tip from Sarah Wilson) and when I’ve got enough, use them up, making broth.

What could be better than arriving home, having made your way through the cold, and warm yourself with a delicious soup or stew? This one is especially comforting for it combines a certain sweetness from the sautéd shallots, the cauliflower and the coconut milk with ‘warming’ spices such as cumin and smoked paprika. Also this soup will keep you warm and satisfied, it is rich in healthy fats, protein and fiber and leave you truly nourished for hours.

Cauliflower-almond-soup

one cauliflower

100g cooked chickpeas (read here how to cook pulses from scratch)

250ml coconut milk

2 tbsp almond butter

ca. 70g almond meal

250ml homemade chicken or vegetable stock

2 shallots

1 garlic clove

3 tbsp cumin seeds

1 tbsp caraway seeds

1 tsp freshly grated nutmeg

pinch of chili OR cayenne pepper OR smoked paprika powder

sea salt

ca. 1 tbsp coconut oil

1 handful whole almonds

1 tbsp Greek style yoghurt per serving (optional, for a vegan version: whisk some of the coconut milk and spoon on the soup)

For the smoked paprika butter

2 tsp smoked (i.e. hot not sweet) paprika powder

60g butter (preferably from pasture-fed cows; for a vegan version use coconut oil)

Another day, another topping. In case, you fancy a herb note, rather than hot spices, have a go at this zesty almond-herb butter:

ca. 5 springs fresh oregano

ca. 5 springs fresh thyme

3 tbsp almond butter

zest of one lemon

1 tsp allspice berries

sea salt to taste

Zesty herb-alond butter

Chop the shallots. Melt the coconut oil in a large pot and sweat the shallots for at least 15 minutes, be careful not to burn them, rather you want them to soften and caramelize. Cut the cauliflower into florets. Chop the garlic. Roast your cumin and caraway seeds in a pan without oil and grind them using a mortar and pestle (by now a lovely warm smell will fill your kitchen). Add garlic, cumin, caraway, nutmeg, chili and salt to the shallots and fry for another 3 minutes. Then add the cauliflower and sauté for about 15-20 minutes on medium heat, until the cauliflower tastes roasted. Add chickpeas, coconut oil, stock and almond butter and let it simmer for another 20-25 minutes. Meanwhile roughly chop the whole almonds and roast them in a pan without oil. Take the pot off the heat and blend it with a hand blender until creamy. Then stir in the almond meal.

To make the smoked paprika butter, place the butter in a small saucepan and melt it on the lowest heat. The milk solids will then separate from the butter fat. Continue to heat until the milk solids turn golden, but make sure they don’t become too dark. This gives the butter a delicious nutty flavour. Stir in the smoked paprika powder until it’s completely dissolved. Remove from heat and spoon on your soup together with a dollop of yoghurt and the roasted almonds.

Cauliflower-almond-soup

In case your making the herb-alomd butter: Roast the allspice berries in a pan without oil and crush them. Set a few leaves of the herbs aside. In a food processor or with a hand blender, blend herbs, zest, salt, allspice and almond butter until smooth. Add a dash of lemon juice if you want an even fresher taste. Serve the soup with a generous spoon of the butter and top with herbs and roasted almonds.

Stuffed pattypan and gem squash

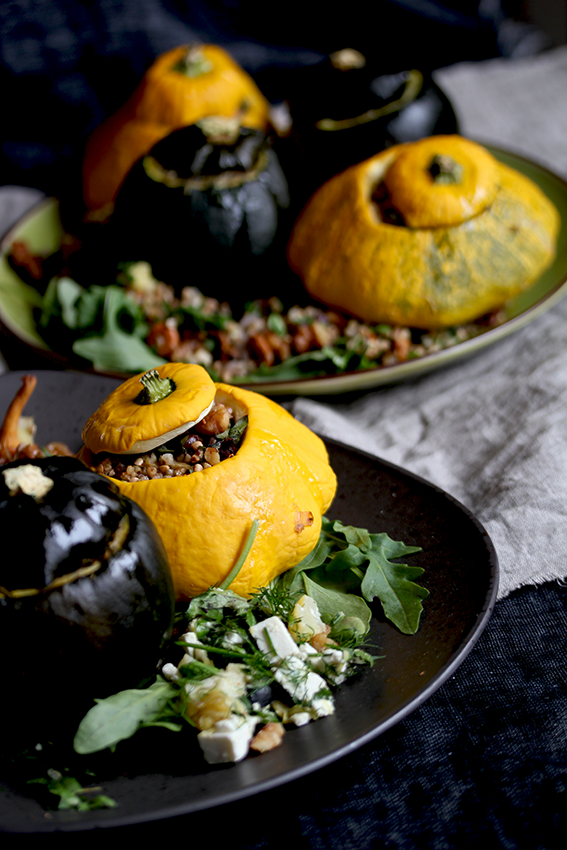
Ideas for new recipes often come to my mind quite unexpectedly. Most of the time it’s just a combination, like Gorgonzola/currants/watercress. Other times, however, I’m seeing something on the market that I just have to try. Like in this case. Although I love pumpkins and squash, I thought of those pretty smaller variety often as not edible, purely decorative breedings, that people buy to place them on the window sill. Maybe you can imagine my excitement, when I saw these little treasures in my organic grocery store! To stuff them just seemed to be the natural solution in order to showcase their beautiful shape. So all I had to do was to think of a filling. I made two different ones for each variety of squash, but of course you could swap them or fill different varieties of squash with just one filling. I had a moment of surprise when I discovered that the gem squash wasn’t at all like I suspected. I imagined it to be like a round, small zucchini – in Germany it is actually called Rondini – far from it! It is more like a spaghetti squash with a very thick and hard skin and a mushy light yellow flesh. I ended up scooping it out, instead of cutting through it, which made the whole thing even more fun.

Note: I have to admit that I made these a few weeks ago, when the pumpkin season started as these varieties are rather what one would call late summer squashes. But I’ve recently stuffed small Hokkaido pumpkins with a similar filling of buckwheat and it turned out to be equally delicious! 

Chanterelles

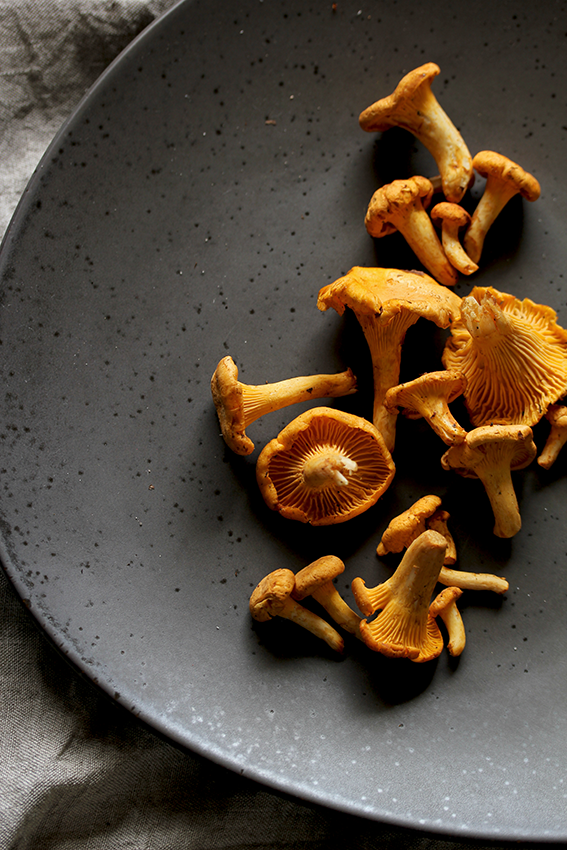
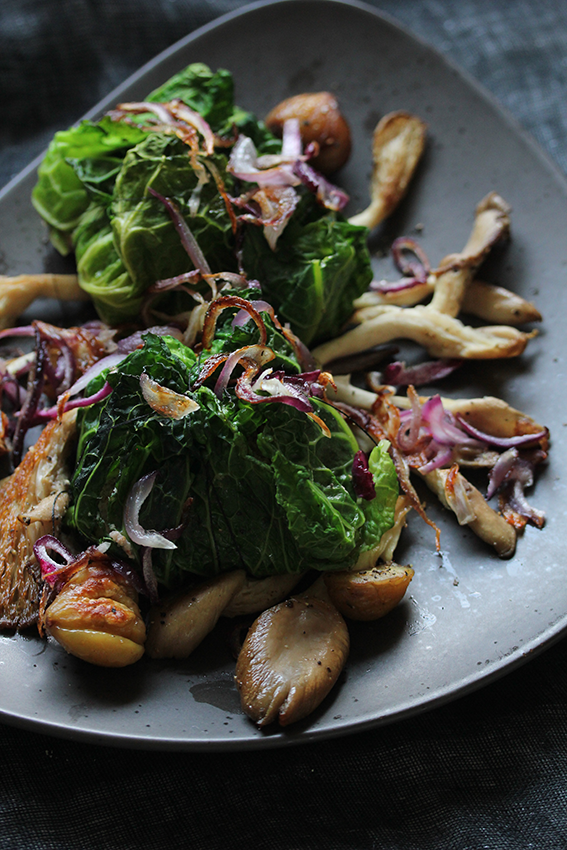
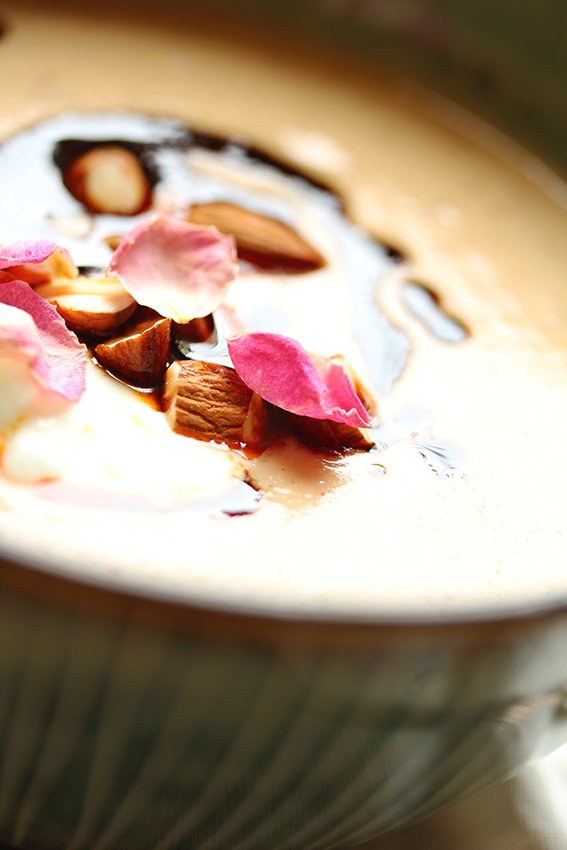
Of course next to pumpkins, nothing symbolizes autumn as much as mushrooms. This year porcinis and chanterelles made a very early appearance on the market, so I could draw on plentiful resources. Ah, how I love chanterelles – probably my favorite mushrooms (but of course you could also make this recipe with other flavourful varieties). To add some extra ‘autumn flavour’ I was keen on trying out a new cooking technique, I read about some time ago: indoor smoking!  Since I don’t have the opportunity to smoke something outdoors, the news of the possibility of indoor smoking seemed just to good to be true. I have to admit that I readily imagined my kitchen to be full of dark smoke and a smell I would never be able to get rid off – but the idea of this certain ‘smoking flavour’ was so tempting that I thought it to be worth a try. And I can assure you: it turned out to be perfectly simple, with no smell at all and a delicious result. You don’t even need any fancy wood shavings or something of that sort. I simply used organic (Important! You certainly don’t want to smoke your food in the emissions of loads of pesticides) green tea and I’m certainly going to experiment with other smoking goods.

How to make a stovetop smoker

You are going to need:

a large pot with a fitting lid, preferably with a thick bottom

a steamer insert (could be made of bamboo of metal or simply use a small grill grate)

tin foil

about 3 tbsp organic green tea

your smoking goods (such as: nuts, mushrooms or other vegetables, tofu, tempeh, cooked grains, salmon…)

Although I am not a big fan of tin foil, in this case it seems to be necessary. Wrap the inside of your pot and the lid with it (see pictures), then place the tea in the middle of the pot’s bottom, set your steaming tool on top of it and scatter your ingredients on it. Heat the pot on the highest mark for about 3-4 minutes, until when you open the lid, there is pleasantly smelling white (not dark!) smoke. Leave the lid firmly closed and keep smoking on the lowest heat for 25-60 minutes, depending on the size of your smoking goods (I left the nuts and mushrooms smoking for about 40 minutes).

And now to the actual recipes:

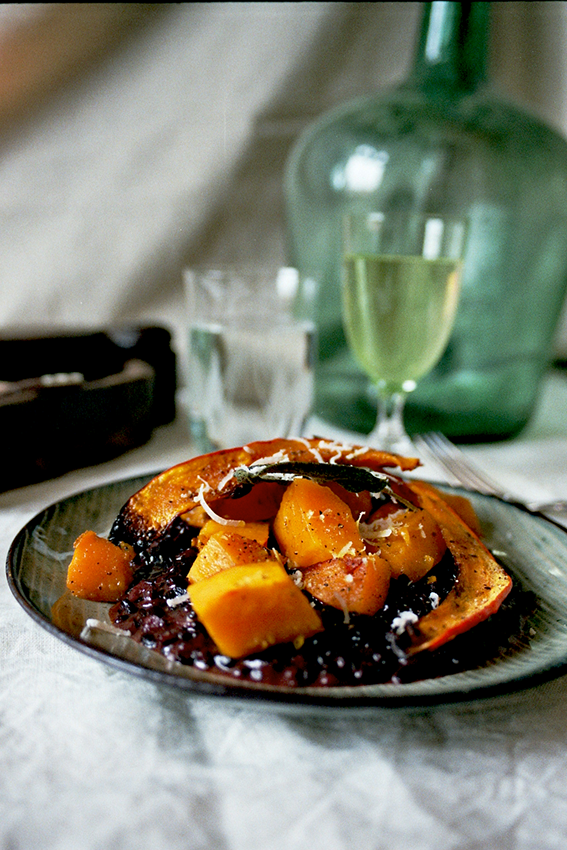
Stuffed pattypan squash

3 pattypan squashes

100g buckwheat

200g chanterelles

1 red onion

80g gruyère

a handfull of flat-leave parsley

a handful (about 30-40g) of walnuts

1 tbsp olive or coconut oil

3 tbsp green tea

sea salt, pepper, nutmeg

arugula/rucola to serve

Buckwheat

First of all, a note on buckwheat: I’m a huge fan of its nutty taste – definitely one of my favourite grains – however I personally dislike its texture when one simply soaks and cooks it. It turns into a rather slimy, porridge-like consistency. What I do to avoid that: I’m soaking the buckwheat over night with some kefir (lactobacilli help break down enzyme inhibitors and phytic acids) or some lemon juice, then I strain it through a sieve, place it on a baking tray and leave it to dry in the oven on a low temperature for about half an hour. Sometimes roasted buckwheat is referred to as kasha – so you might want to try this. You can of course skip the roasting bit, but it gives the filling some nutty-crunchyness.

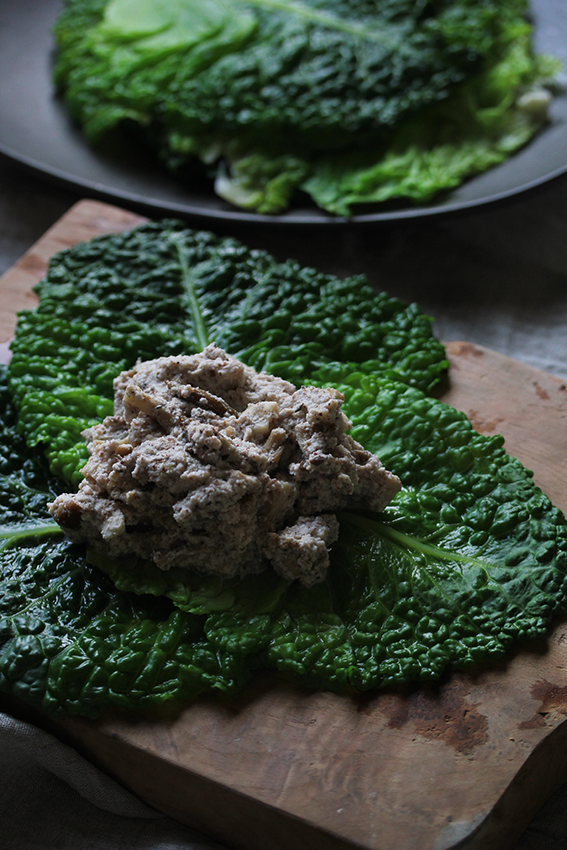
So first of all prepare your buckwheat, by soaking and then either cooking or roasting it (see note). Carefully clean the chanterelles and smoke them together with the walnuts for about 40 minutes. Cut off the tops of your pattypans and carefully scoop out the interior, discarding the seeds but saving the flesh. Heat a little coconut or olive oil in a pan and sauté the chopped onion together with the sqaushes’ flesh, seasoned with a little salt and pepper. Chop the parsley and grate the gruyère. Mix in a bowl with buckwheat, smoked nuts and chanterelles, onion and squash and season to taste with salt, pepper and nutmeg.

Stuffed gem squash

3 gem squashes

100g feta

generous handful of dill

handfull of parsley

2-3 springs of mint

4-5 black olives

¼ of a small preserved lemon (see here how to preserve lemons)

2 tbsp or pine nuts (or use walnuts as well)

1 clove of garlic

black pepper, sea salt

1 tbsp coconut or olive oil

arugula/rucola to serve

Cut off the squashes’ tops and carefully scoop out the interior, discarding the seeds but saving the flesh. Roast the nuts in a pan without oil and put aside, then heat a little coconut or olive oil in the pan and sauté the chopped garlic together with the squashes’ flesh, seasoned with a little salt and pepper. Chop the herbs, dice the feta and the preserved lemon and slice the olives. Mix all ingredients in a bowl.

Stuff the squashes, top with their lids, place on a baking tray and drizzle with a little oil. Fill a shallow dish with water and place it on a rack on the lowest level in your oven. Place the baking tray with the squashes above it and roast them for about 50-60 minutes, depending a little on their size (they should start to get a few wrinkles and the flesh of the pattypan should have softened).

Serve with leftover filling and some rucola with a basic dressing, if you like.


Sheep’s milk cheesecake with poppy seeds

As I haven’t been baking for a rather long time, this was a little adventure. Things didn’t get easier when I became quite ambitious and wanted everything to be perfect, since this was to be my mum’s birthday cake.

One of her favorite cakes is a tray bake from Thuringia. It’s basically a kind of cheesecake made with a yeast dough base, a filling of Quark (fromage frais) and Schmand (crème fraîche), different fruits such as cherries and gooseberries, or poppy seeds. The mixture is then topped with beaten egg whites and more Schmand. Often German and Central European poppy seed cakes tend to be quite dry. Not so in this case! The poppy seed mixture is cooked with semolina and milk before it is added to the Quark-Schamnd mixture. A very rich and creamy matter…

I wanted to create a lighter version of that regional speciality of which every bakery in Thuringia has its own (and quite different recipe). My aim was to make it sugar and gluten-free and I also wanted to play around a little with sheep’s milk products. Although I stopped eating vegan, I am still cautious about dairy products. My advice would be to always use full-fat (only then you are enjoying a whole product) milk from pasture-fed (this I consider especially important: a grain diet is not natural for cows and their milk will be less nutritious) cows that is not homogenized. Also cultured dairy products (such as yoghurt, kefir, quark) seem to be much more beneficial. If you want to learn more, I really recommend Sally Fallon’s Nourishing Traditions.

One of her favorite cakes is a tray bake from Thuringia. It's basically a kind of cheesecake made with a yeast dough base, a filling of Quark (fromage frais) and Schmand (crème fraîche), different fruits such as cherries and gooseberries, or poppy seeds. The mixture is then topped with beaten egg whites and more Schmand. Often German and Central European poppy seed cakes tend to be quite dry. Not so in this case! The poppy seed mixture is cooked with semolina and milk before it is added to the Quark-Schamnd mixture. A very rich and creamy matter...

In comparison to cow’s milk, sheep’s milk contains considerably higher amounts of protein, calcium and vitamin B12, it also has a much higher fat content (but like goat’s milk these are mainly medium-chain fatty acids, that also possess antimicrobal virtues. Don’t be scared off by the high fat content, read more about saturated fats here). What is more, the proteins that can be hard to digest in cow’s milk are smaller in goat’s and sheep’s milk and are therefore much easier digestible (read more about it, here).

For the base:

80g fine almond meal

30g finely chopped almonds

50g butter, room temperature

1 tbsp poppy seeds

2 tsp zest of an organic lemon

1 generous pinch of sea salt

For the filling:

600g sheep’s quark (or fromage frais, ca. 8g fat)

250g greek style sheep’s yoghurt (10g fat)

juice and remaining zest of one lemon

1 large organic egg

40g poopy seeds

4 tbsp granulated stevia

pinch of sea salt

1 tsp ground vanilla bean/unsweetened vanilla powder

 For the topping:

100g sheep’s quark

juice of 1/2 lemon

150g frozen raspberries

50g mix of fresh berries

Ideally you should start to make the filling the night before by pouring the yoghurt and the quark onto a large cheesecloth, muslin or very fine sieve and place it over a bowl in oder to strain out the whey. This is really an important step! I didn’t do it over night and my cake lost quite a lot of ‘water’ during baking. You can keep the whey to ferment vegetables or to soak your grains in!

Poppy seed and lemon cheesecake

On the next day, preheat the oven to 170°C. Line the base and the sides of a 20 cm spring-form tin. Mix all the ingredients for the base with your hands until you receive a dough consistency (only very carefully add more butter, the almonds and poppy seeds are already quite fatty). Press into the base of your baking tin and bake for 8-10 minutes until it starts to turn golden. Remove from the oven and let cool down.

Combine the ingredients for the filling in a bowl and carefully whisk them together. Spoon onto the cooled base and return to the oven for 20-30 minutes. The mixture should be pulling away from the sides and the centre should still be custard-like (don’t overcook!). Let cool down completely. I achieved a much better result after placing the cooled cake in the fridge for two hours to firm up.

To make the topping, whisk quark and lemon juice together until creamy and spread on top of the cake. Purée the frozen raspberries with a hand-held blender. Add a little more stevia if you like. Spoon on the cake and decorate with fresh berries.


Fig & halloumi wraps with pistachio pesto

I already complained in the last post about the cold, damp August – nothing has changed. Even so, I’ve decided that I won’t let the weather spoil my mood completely and made this absolutely delicious late summer-picnic wraps (as I am munching away on the leftovers I have to underline just how delicious they are. Damn.)

That they turned out so well in the end is actually rather a surprise. I originally attempted to make my own buckwheat pita breads. Well. It ended in a catastrophe. I wanted to keep it simple and made a dough of buckwheat flour, water, dry yeast and some olive oil. It turned out far too sticky to be manageable and I kept adding flour and adding flour and adding flour – horrible. I finally managed to roll them out and fried some in the pan and baked the rest in the oven, but the result was nothing but an unpalatable, hard disk. Utterly frustrated I went to buy some tortilla wraps….Please feel free to share your experiences or recipes for buckwheat pitas or wraps! Maybe one day I will have another go – certainly not too soon.

My inspiration for this dish was the celebration of the fig. To me a really precious crop. Like the pomegranate it somehow – even within our globalized food market – has preserved its air of being special or even royal. At least in Northwest Europe. I’ve recently been on a beautiful Dalmatian island, in the very south of Croatia, and on a hike stumbled across a remote olive and fig orchard. No one seemed to care, but the butterflies and wasps, and the ripe figs were bursting right on the tree. I couldn’t help myself and picked some – the best hiking snack I ever had. I hope these picnic wraps capture a little of this late summer feeling with the figs’ sweetness, the saltiness and richness of the halloumi and the pistachios rounded with some minty freshness.

The recipe will make 4 very large tortillas or 6 smaller ones:

4-6 tortillas wraps (use gluten-free if you prefer)

6 figs

150g pistachios (you can either use raw ones or salted, roasted pistachios)

3 small aubergines

150-200g rucola

1 big bunch of basil

5-7 springs of mint

150g halloumi

1 lime

1 small garlic clove

ca. 5 tbsp olive oil

coconut oil

sea salt, black pepper

2 tsp freshly ground cumin

1 tbsp pink pepper berries

Figs

If you’re using roasted, salted pistachios, set a few aside and soak the rest for about an hour in some water. Quarter the aubergines lengthwise and slice into regular slices. Mix in a bowl with 1-2- tbsp olive oil, cumin, salt, black and slightly crushed pink pepper and minced garlic. Place on a baking tray and put in the preheated oven for 20-25 minutes at 200°C until the aubergine is softened, but also slightly crunchy.

To make the pesto, set a few mint and basil leaves aside. Drain the pistachios and blend with herbs, juice of 1/2 a lime and 2-3 tbsp olive oil. Add some water if necessary to reach the desired consistency. Season to taste with some more lime juice, salt and pepper.

Halloumi wraps with figs

Slice the halloumi and fry it in coconut oil or – much better – if you are having an outdoor barbecue: grill it! Slice the figs. In a pan without oil heat the tortilla wraps for 1-2 minutes on each side. Spread the warm tortillas with the pesto, place roasted aubergines and rucola on them, top with halloumi and figs and sprinkle with remaining herbs, pistachios and a squeeze of lime juice. Roll up the wrap – I found parchment paper and some kitchen string very handy.


Aubergine filled with spiced pumpkin and crispy tempeh

It has been unseasonally cold this August in Germany and I had a feeling that plums, peaches and ripe tomatoes were very soon replaced by the first pumpkins, chestnuts and chanterelles, which appear to be in season very early this year.

Since I LOVE pumpkin and am waiting all year round for it to be available again – for in Germany one cannot find butternut squash all year round like in the UK (it’s the same with kale, which I’m craving all year long until it’s making a very short appearance …but than again, this is what it means to cook along the seasons – so I’m not complaining) – I decided to make the best of it and made a dish with an earthy, comforting pumpkin purée that’s perfect for chilly days. I teamed it up with last bits of summer: beautiful aubergines and gave it a fresh twist with the coriander-mint-chimichurri.

I guess we all have some special dishes that remind us of home – no matter how simple they are, they posses the power to comfort us and make us happy. In my case this would be my granny’s very rustic and thick potato soup, a hot and spicy sauerkraut soup with sausages my mum uses to make in winter and aubergines stuffed with a tomato sauce and either minced meat or feta straight from the oven. I lately had the pleasing effect of this flavour combination, when I made this Italian classic (delicious!). I remembered my beloved aubergine ‘boats’ and tried to create a whole new version…

I also wanted to finally post a recipe with an ingredient that I learned to love in the course of this year, when I was still eating vegan and was looking a little deeper into the soy ‘issue’. Tempeh! If you haven’t tried it yet – this is definitely something you shouldn’t miss. I’ve seen it making an appearance in some organic grocery stores lately, but there it’s very expensive. I am buying it in Asian grocery shops, where it costs a fraction – just make sure non-GMO soy beans are used. Why is tempeh so great? Well, first of all because it tastes so good! Unlike tofu, tempeh has a very nice taste of its own – I find it quite nutty – as well as a great texture. Originally from Indonesia, tempeh are whole soybeans mixed with rice flour, fermented by a bacteria culture that binds the beans into a firm ‘cake’. The fermentation is the important part, for soybeans contain a very high amount not only of enzyme inhibitors, but especially of phytic acids, that cannot be broken down by soaking and cooking alone. Yet fermentation does the trick (miso is another example for such a fermented soy product). I like tempeh best sliced or cut into chunks, marinated with a little soy sauce, chili and fresh ginger and then fried – its great with something fresh such as cucumbers and coriander.

But to the recipe (serves 4):

2-3 aubergines

1 small Hokkaido pumpkin (can be substituted with butternut or muscat squash)

150-200g tempeh

1 tbsp cumin seeds

1 tbsp coriander seeds

1/2 tsp cinnamon

2 tsp freshly grated nutmeg

5 cardamom pods

1 tsp freshly ground allspice berries

sea salt and black pepper

1/2 tsp chili flakes or cayenne pepper

1-2 tbsp tamari (or other soy sauce)

1-2 tbsp coconut oil

1 tbsp of white and black sesame seeds each


For the coriander-mint chimichurri:

1 big bunch of coriander (set some leaves aside for decorating)

1 big bunch of mint (set some leaves aside for decorating)

juice of 1 lime

3 tbsp of olive OR sesame oil

sea salt to taste

Roast cumin, cardamom and coriander seeds and allspice in a pan without oil and ground them with a mortar and pestle. Preheat the oven to 220 °C. Wash the pumpkin (if using Hokkaido, you don’t have to peel it), dice it and mix it in a bowl with coconut oil, grounded spices, cinnamon, nutmeg and a generous amount of sea salt. Place on a baking tray and roast in the oven until soft.

Meanwhile, slice the tempeh and marinate it with tamari and chili. In fact I made two marinates: the other one being the chimichurri, which gave the tempeh more freshness due to the lime. Cut the aubergines lengthwise and scoop out the interior (Don’t throw it away! It’s great for pasta sauces.). Slightly season the aubergine’s inside with salt and black pepper. Remove the pumpkin from the oven and purée it with a hand held blender. You might want to add a little water or stock, for it must not be to dry since there is no other sauce in which the aubergine boats are braised. Fill the purée in the aubergine halves and place either in a casserole with a lid or on a baking try covering the aubergines with tin foil. Bake in the oven at ca. 180°C for about 20-30 minutes until the aubergines’ flesh becomes mushy.

For the chimichurri blend the herbs with the lime juice, oil and a little salt. Add a little water if you want it to be a bit thinner. I actually served the aubergines on a bed of the sauce – this might be a bit to flavorful for some – you could serve them on wilted spinach, chard or with a salad.

Roast sesame seeds in a pan and set aside, then heat coconut oil in that pan and fry the tempeh slices until crispy and golden. Generously spoon the chimichurri on the pumpkin, top with the tempeh and sprinkle with herbs and sesame seeds.

Aubergine with pumpkin purée and tempeh


Two versions of zucchini flowers

This my official midsummer celebration dish for you!

Having no garden myself, I got soooo excited when I found zucchini flowers on the market! Ever since I saw a deep fried version years ago in an Italian cookbook, I’ve dreamed about inventing a recipe myself. And now – finally – they were sitting in abundacne right in front of me. I carried them home feeling like a treasure seeker with a box of jewels. It was a surprise that I had found them, so I had to improvise and bought three more ingredients that celebrate the season like little else: cherries, peaches and green beans.

Zucchini Flowers

Wanting to make the most of my treasure trove, I made two different versions: for the first, I filled the flowers and baked them in the oven (this one can easily be turned in a vegan recipe), for the other, I coated the flowers in a gluten-free crust and fried them – both are absolutely delicious! Each recipe will serve for 2 persons as a light meal or for 3-4 as a starter. Of course you don’t have to make both recipes at the same time like I did – I wrote down the recipes as if they were individual ones.

Zucchiniblüten-169

1) Filled Zucchini Flowers

10 zucchini flowers

200g green beans

10-15 cherries

1 peach

ca. 200g almond pulp (from making almond milk or almond meal mixed with 1 tbsp of water)

80g pecorino oder parmesan (simply omit the cheese to make a vegan version or even better: substitute with nutritional yeast)

a handful of flat leaved parsley

a few mint springs + a few leaves to sprinkle the dish with in the end

ca. 2 tbsp olive oil

1 tsp of pink pepper berries

1/2 tsp sea salt, black pepper and nutmeg

a little lime or lemon juice

if you want the dish to be more like a salad, add arugula or sorrel

Zucchiniblüten-176

To make the filling, finely chop the herbs and mix with almond pulp, grated cheese (or nutritional yeast), sea salt, black pepper and freshly ground nutmeg. Preheat the oven to 180 °C. Carefully remove the pistils from the bottom of the flowers and fill 1 tsp of the mixture in each of the flowers. Set a little of the filling aside in order to crumble it over the dish in the end. If possible, carefully twist the tops of the flowers and line on a baking tray. Drizzle or brush with olive oil and sprinkle with a little sea salt. Bake in the oven for 10-12 minutes until they become crisp and golden.

Trimm the beans and steam or cook them until just tender, you don’t want them to become too soft. They should still have a certain crunch. Half and pit the cherries. Slice the peach and grill the slices in a griddle pan (or simple use a normal pan) with a little olive oil, a pinch of sea salt and the pink pepper. Assemble the beans with the peach slices and the salad leaves, if you are using them, top with cherries and courgette flowers, sprinkle with mint leaves and leftover filling and drizzle with a little lime juice.

Zucchiniblüten-174

2) Fried Zucchini Flowers with an almond-quinoa crust

10 zucchini flowers

200g green beans

10-15 cherries

1/4 or 1/2 fresh chili (depending on its size and your taste)

a few springs of parsley & mint

120-150g almond pulp (leftover from making almond milk, or use almond meal)

1 egg

80-100g quinoa flour

1/2 tsp sea salt, black pepper and nutmeg

ca. 3-4 tbsp coconut oil

ca. 30-50g shaved pecorino or parmesan

a little lime or lemon juice

if you want the dish to be more like a salad, add arugula or sorrel

Carefully remove the pistil from the bottom of the zucchini flowers. Prepare three shallow dishes: the first one with the quinoa flour, the second with the scrambled egg – whisk in sea salt, black pepper and freshly grated nutmeg, and the third with the almond pulp/meal. Toss each stuffed flower first in the flour, shaking off any excess, then in the egg. Finally coat with the almond meal and set aside. Heat the coconut oil in a frying pan and carefully place the flowers in the hot oil (reduce to medium heat). They’ll take about two minutes on each side to turn golden nicely (be carful not to burn them. Remove from the pan, drain on kitchen paper and sprinkle with a little salt & pepper.

Meanwhile, trimm the beans and steam or cook them until just tender, you don’t want them to become too soft. They should still have a certain crunch. Half and pit the cherries. Slice the chili very finely. To assemble, place the zucchini flowers on the beans, cherries (and sale leaves, if you are using them) and sprinkle with the chili, shave pecorino, torn parsley & mint leaves and drizzle with a little lime juice.

Zucchiniblüten-175


Buckwheat summer tart

The other day I got a little carried away at the sight of the mountains of tomatoes so deliciously ripe and glowing red…and ended up buying A LOT. Back home I came back to my mind and realized that if I did not want to spend the next couple of weeks eating pizza and pasta with tomato sauce, I’d have to think of something else. So I teamed the tomatoes with zucchinis, which are also in season right now (hence their other name, summer squash) and basil – obviously always a heavenly combination – and turn the whole thing into a tart.

I’ve been playing around lately with buckwheat flour, which is possibly my favourite gluten-free flour, and was actually quite surprised how well this tart crust turned out. As well as in the processing as in taste.

Just after I had made the photos, I realized I had assembled Italy’s national colours, red, white and green. While this isn’t quite an Italian classics, I doubt, there is anything that symbolizes summer more than tomatoes, garlic and basil on a (imaginary) Tuscan table.

Tomates // From Hand To Mouth

I used a 24 cm diameter tart tin, for larger baking tins, you might need to adjust the recipe.

For the crust:

150g buckwheat flour

50g quinoa flour

2 tbsp arrowroot starch (can be substituted with corn starch)

2 tbsp ground hazelnuts

¼ tsp sea salt

50g butter (add more if necessary until you’ve got a smooth texture)

1 organic egg

60-70ml cold water

For the filling:

150ml soured cream (German soured cream (10 % fat) is not the same as American sour cream, if you can’t find it, replace with crème fraîche, which has 30%, but a similar taste)

1 organic egg

30g pecorino + extra for topping

1 BIG bunch of basil + leaves for topping

sea salt (depending a little on how old – intense – the cheese you are using is)

freshly ground pepper

1 large zucchini

about 25 cherry tomatoes

1 clove of garlic

1 tbsp olive oil

1 spring of rosemary

Buckwheat Summer Tart // From Hand To Mouth

To make the crust, whisk together all dry ingredients, then add butter and the egg. Knead with your hands, while gradually adding the water until you’ve got a smooth ball of shortcrust pastry. Put it in the fridge for at least one hour, but preferably over night (this really makes a difference in the result).

Preheat the oven to 220°C. Grease the tart tin. Roll out the crust between two sheets of baking paper and place in the tart tin (cut off excess batter around the edges). Prick the crust a few times with a fork and pre bake in the oven for about 8-10 minutes (this is important, otherwise it will be undercooked).

To make the filling, blend together soured cream, grated pecorino, the egg, basil, sea salt and pepper using a hand held blender or a food processor. Finely slice the courgette and sauté for about 2-3 minutes in a pan on medium heat with olive oil, finely chopped garlic and rosemary, salt and pepper. Remove the pastry from the oven, pour in the cream-basil mixture, assemble the zucchini slices like a circle and place the whole cherry tomatoes in the middle. In the very centre and in some of the gaps I placed quartered tomatoes. Transfer back to the oven and bake on 200°C for 40-45 minutes until the filling has set and the crust has become golden. Sprinkle with a little more grated pecorino and torn basil leaves and serve either warm or cold on a summer picnic.